7 Tips to Speed Up File Transfers
Last Updated:
Nobody enjoys watching a progress bar slowly inch forward while copying important files.
Whether you’re backing up photos, moving work documents, or transferring files to an external drive, slow transfers eat away at your productivity and patience.
The good news is that Windows 11 file transfers don’t have to be sluggish.
I’m going to show you how to speed up your file transfers with some simple tricks that work really well.
Beyond that, a few smart choices about hardware can make copying files feel almost instant.
Most users stick with the same old drag-and-drop method they’ve always used, never realizing there are much faster alternatives.
Once you know these techniques, you’ll wonder why you ever put up with slow transfers.
Here’s exactly what you need to do to speed up your file transfers on Windows 11.
Switch from Hard Drive to SSD
Here’s the truth nobody tells you: your hard drive is probably the biggest bottleneck in your entire system.
If you’re still using a traditional hard disk drive (HDD) —you’re working with much slower technology.
HDDs have to physically move parts to read and write data, which creates a bottleneck for file transfers.
What’s the difference? A typical HDD copies files at 30 to 150 megabytes per second.
That’s not terrible, but it’s not great either.
A solid-state drive (SSD) — which uses flash memory instead of spinning disks — rockets along at 500 megabytes per second or more.
That’s roughly three times faster on the low end.
But here’s where it gets really exciting: NVMe SSDs (Non-Volatile Memory Express) can hit 3,000 megabytes per second.
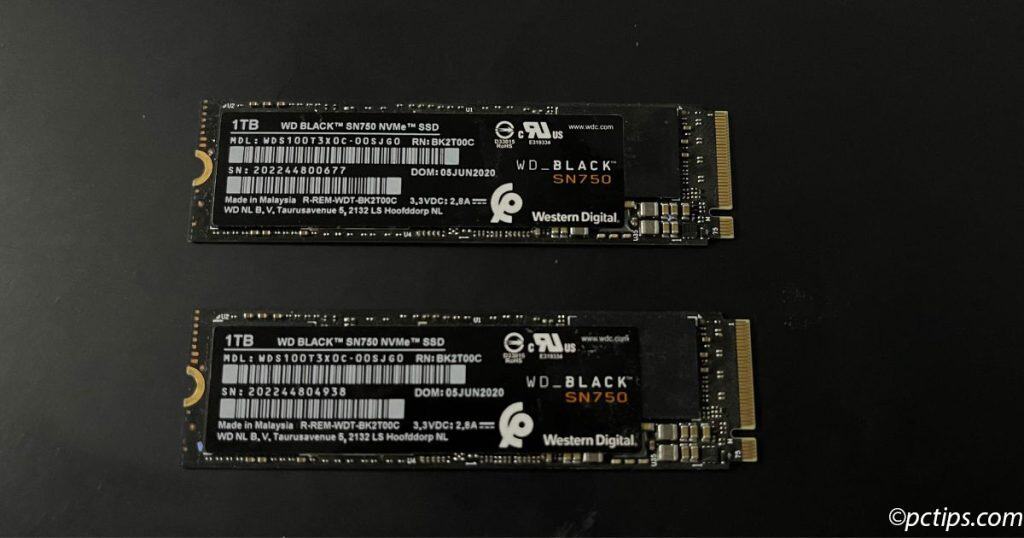
We’re talking about copying a full movie file in seconds instead of minutes.
Quick reality check: If you’re copying a 4GB movie file, an old HDD might take 2-3 minutes.
An NVMe SSD? About 15 seconds.
How to tell what you have: Press Ctrl + Shift + Esc to open Task Manager.
Then Go to the Performance tab.
Click on Disk 0 (or other disks).
It will say “SSD” or “HDD” under the disk name.
The investment pays for itself in saved time and reduced frustration.
Trust me on this one.
Use USB 3.x Ports
If you’re copying files to an external drive, your choice of USB port directly affects transfer speeds.
Yet most people plug their drives into whatever port is convenient.
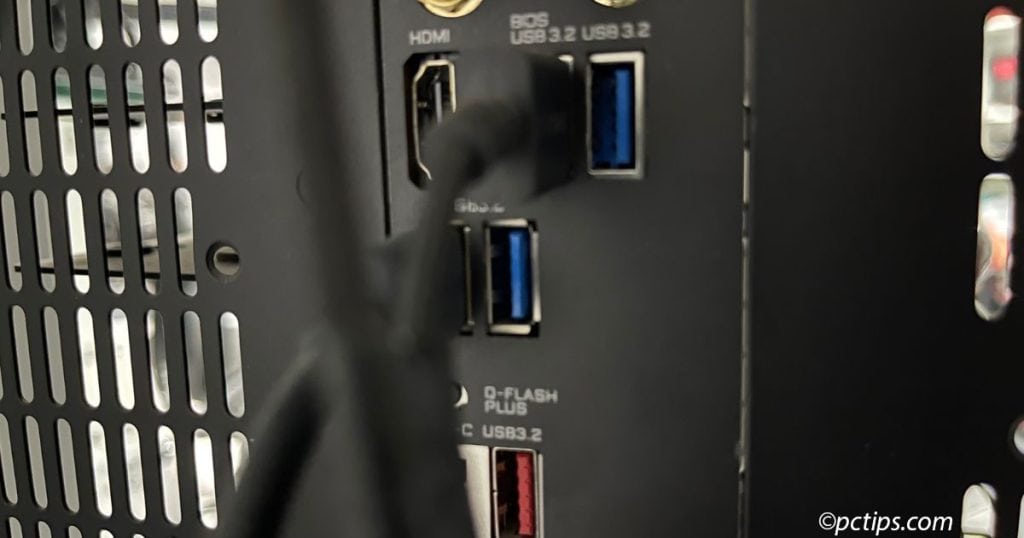
Here’s the simple rule: Use the fastest USB port available — and that usually means avoiding black ports (USB 2.0) and aiming for blue or labeled ones (USB 3.x).
What Do the Colors and Labels Mean?
- Blue plastic inside the port usually indicates USB 3.0 (also known as USB 3.2 Gen 1).
- Teal or red ports might indicate USB 3.1 / 3.2 Gen 2 or even USB 3.2 Gen 2×2.
- Look for “SS” (SuperSpeed) markings, and sometimes you’ll see “10Gbps” or “20Gbps” near the port.
- On newer devices, USB-C ports may support USB 3.2 or even USB4 — check your system specs to confirm.
Real-World Speed Comparison
| USB Version | Marketing Name | Max Speed (Real-World) |
| USB 2.0 | — | ~60 MB/s |
| USB 3.0 / 3.2 Gen 1 | SuperSpeed | ~625 MB/s |
| USB 3.1 / 3.2 Gen 2 | SuperSpeed+ | ~1,250 MB/s |
| USB 3.2 Gen 2×2 | SuperSpeed+ (20Gbps) | ~2,500 MB/s |
How to Identify USB 3.x Ports on Your PC:
- Visual inspection: Look for blue, teal, or red plastic inside USB-A ports or USB-C with “SS” or speed labels.
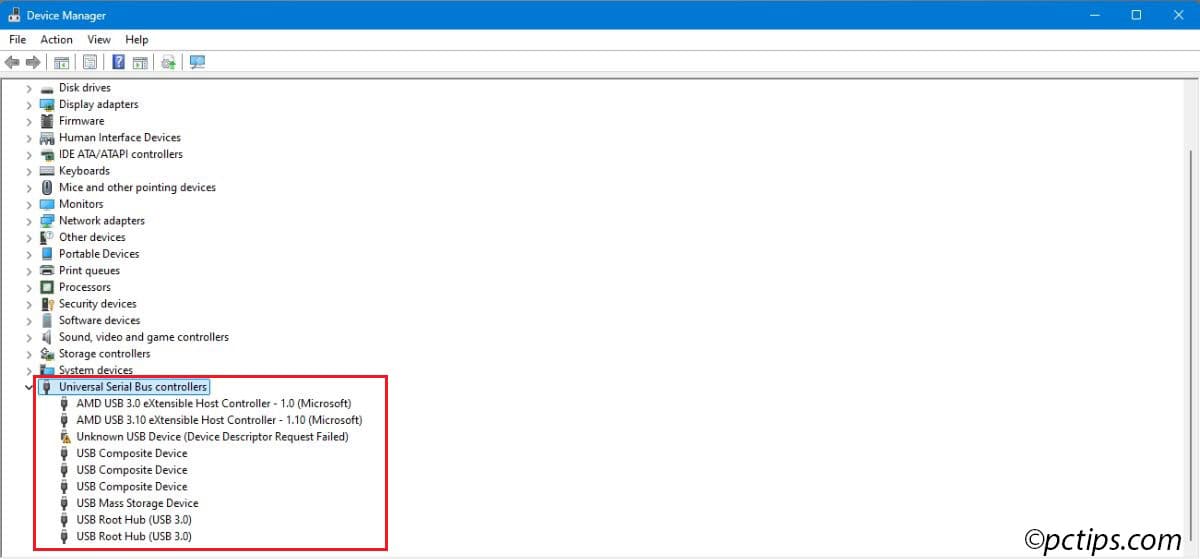
- Device Manager check:
- Press Windows + S, type “Device Manager,” and open it.
- Expand “Universal Serial Bus Controllers.”
- Look for entries like “USB 3.0/3.1/3.2 eXtensible Host Controller” — those are your faster ports.
Mistakes to Avoid:
- If your external drive supports USB 3.x but you plug it into a USB 2.0 port, you’re limited to USB 2.0 speeds.
- Using older or low-quality USB cables can also bottleneck your speeds — always use certified USB 3.x cables for the best performance.
Expert Tip: If your desktop computer only has USB 2.0 ports, you can add faster ports by installing a USB 3.0/3.2 PCIe expansion card.
These cost around $15–25 and can drastically speed up file transfers.
Convert Drives to NTFS
Your drive’s file system is like the organizational method it uses to store and retrieve files.
And just like some filing systems are more efficient than others, NTFS is significantly faster than FAT32 for most tasks.
What’s the difference? NTFS (New Technology File System) is Windows’ modern file system.
FAT32 (File Allocation Table 32) is an older system that’s still hanging around for compatibility reasons.
NTFS reads and writes data more efficiently, which translates directly to faster file transfers.
How to check what you’re using: Press Windows + E to open File Explorer, right-click your drive, and select “Properties.”
Look at the “File System” entry on the General tab.
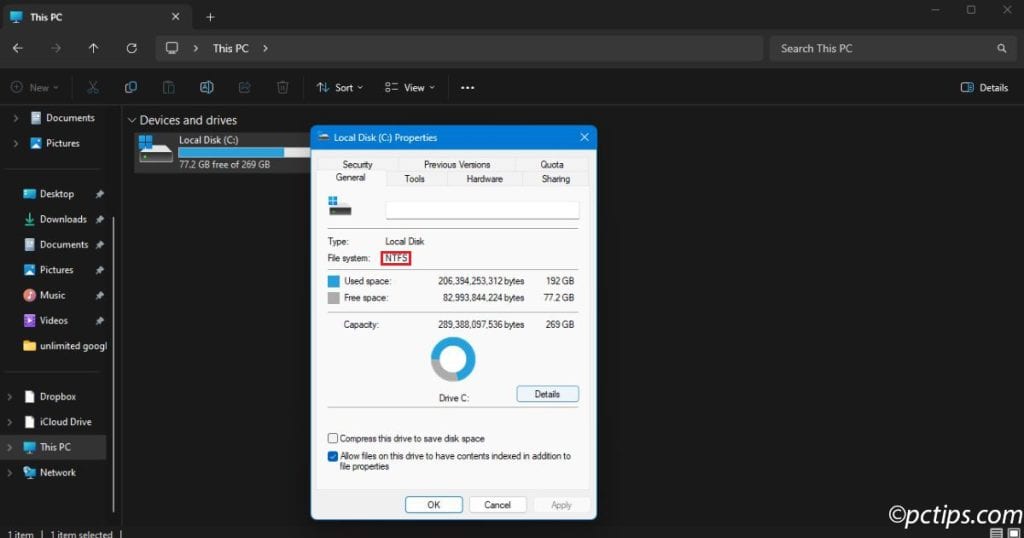
Most Windows drives use NTFS by default, but some external drives might still use FAT32.
Converting without losing data: If you find a drive using FAT32, you can convert it to NTFS without reformatting (and losing all your files).
Here’s how:
- Press Windows + S and type “Command Prompt”
- Right-click and select “Run as administrator”
- Click “Yes” when Windows asks for permission
- Type this command:
convert X: /fs:ntfs(replace X with your drive letter) - Press Enter and wait for the conversion to complete
The nuclear option — formatting: If it’s a new drive or you don’t mind erasing everything, you can format it directly to NTFS.
Right-click the drive in File Explorer, choose “Format,” select “NTFS” from the File System dropdown, and click “Start.”
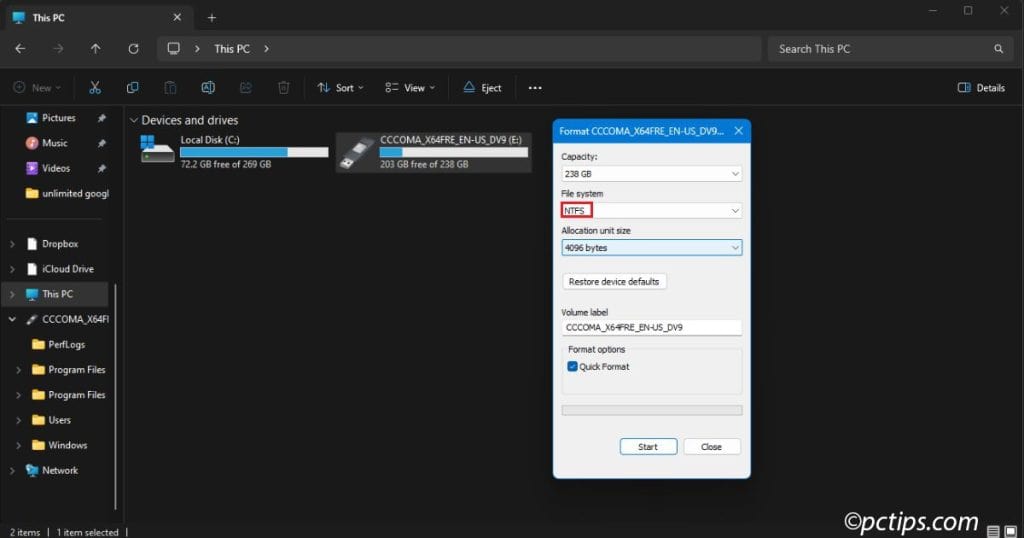
Remember: This erases everything on the drive, so back up important files first!
Use Robocopy Instead of Drag-and-Drop
Hidden in every copy of Windows is a command-line tool called Robocopy (Robust File Copy) that most people never use.
This tool can copy files faster than the standard drag-and-drop method you’re probably using.
It’s been around for years, but most people have never heard of it.
Why is it faster? Robocopy uses advanced techniques like multithreading (doing multiple things at once) and smarter error handling.
While File Explorer copies files one at a time, Robocopy can juggle multiple files simultaneously.
Here’s how to use it:
- Press Windows + S and type “Command Prompt”
- Right-click and select “Run as administrator”
- Type this command:
robocopy "C:\Source\Folder" "D:\Destination\Folder" /e /z /mt:16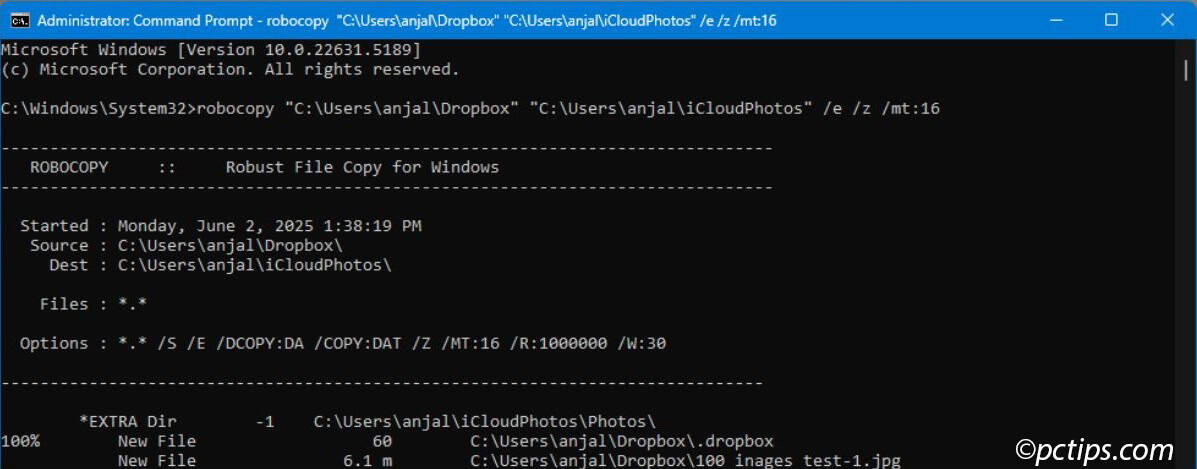
Let me break down that command:
- Replace the folder paths with your actual source and destination
- /e copies all subdirectories, including empty ones
- /z lets you resume if the transfer gets interrupted
- /mt:16 uses 16 threads for parallel copying (faster on modern computers)
I recently used Robocopy to move 50GB of photos from one drive to another. File Explorer estimated 25 minutes; Robocopy finished in 12 minutes.
Not bad for typing one command!
Important note: The paths need quotes around them if they contain spaces. So “My Documents” needs quotes, but C:\Users doesn’t.
Disable Antivirus Scanning Temporarily
This might sound counterintuitive, but your antivirus software could be slowing down file transfers.
Real-time protection scans every file as you copy it, which creates a bottleneck during large transfer operations.
The temporary solution: Disable real-time scanning while you’re doing major file transfers, then turn it back on immediately afterward.
Here’s the step-by-step process:
- Press Windows + S and type “Windows Security”
- Open the app and click “Virus & threat protection”
- Under “Virus & threat protection settings,” click “Manage settings”
- Turn off the “Real-time protection” toggle
- Click “Yes” when Windows asks for confirmation

CRITICAL REMINDER: Turn real-time protection back on as soon as your file transfer finishes.
Your computer is vulnerable while this is disabled.
Is this safe? For short periods during file transfers?
Yes, especially if you’re copying files between your own trusted drives.
Just don’t browse the internet or download files while protection is disabled.
Alternative approach: Many antivirus programs let you exclude specific folders from real-time scanning.
If you’re frequently moving files to and from certain locations, consider setting up exclusions instead of completely disabling protection.
Compress Files Before Transferring
File compression reduces data size, which directly translates to faster transfer times.
Compression also turns many separate files into one archive, making transfers easier for your computer to handle.
How much difference does this make? It depends on your files.
Photos and videos don’t compress much (they’re already compressed), but documents, spreadsheets, and text files can shrink by 50-80%.
That translates directly to faster transfers.
The added benefits: Transferring 1,000 individual files creates significant file system overhead.
A single compressed archive eliminates this bottleneck, often resulting in 20-30% faster transfers even when compression doesn’t reduce file size.
Your computer’s file system loves this.
Using Windows’ built-in compression:
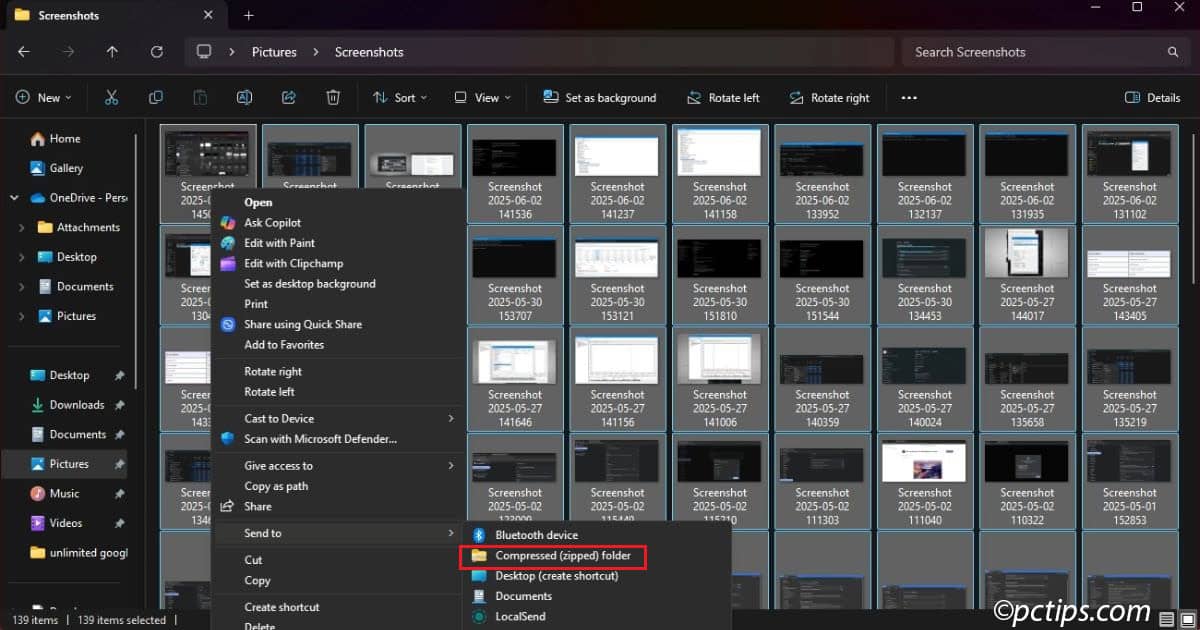
- Press Windows + E to open File Explorer
- Select the files you want to compress (hold Ctrl and click to select multiple files)
- Right-click on one of the selected files
- Choose “Show more options” → “Send to” → “Compressed (zipped) folder”
Professional alternatives: For regular use, 7-Zip (free) consistently achieves better compression ratios than Windows’ built-in tool.
It supports multiple formats and offers advanced options like compression level adjustment and encryption.
Strategic application: Use compression for document transfers, software installations, and mixed file collections.
Skip compression for media files unless you need the organizational benefits of a single archive file.
Close Background Programs
Running multiple programs simultaneously slows down file transfers by competing for your computer’s resources.
When you’re moving large amounts of data, closing unnecessary applications can significantly improve transfer speeds.
Background programs consume more resources than you realize.
Streaming apps, photo organizers, cloud sync services, and games you forgot to close all use memory and processing power.
This leaves fewer resources available for your file transfer, which slows down the entire process.
Quick method: Check your taskbar and close programs you’re not using by clicking the X in the top-right corner of each window.
The thorough way (using Task Manager):
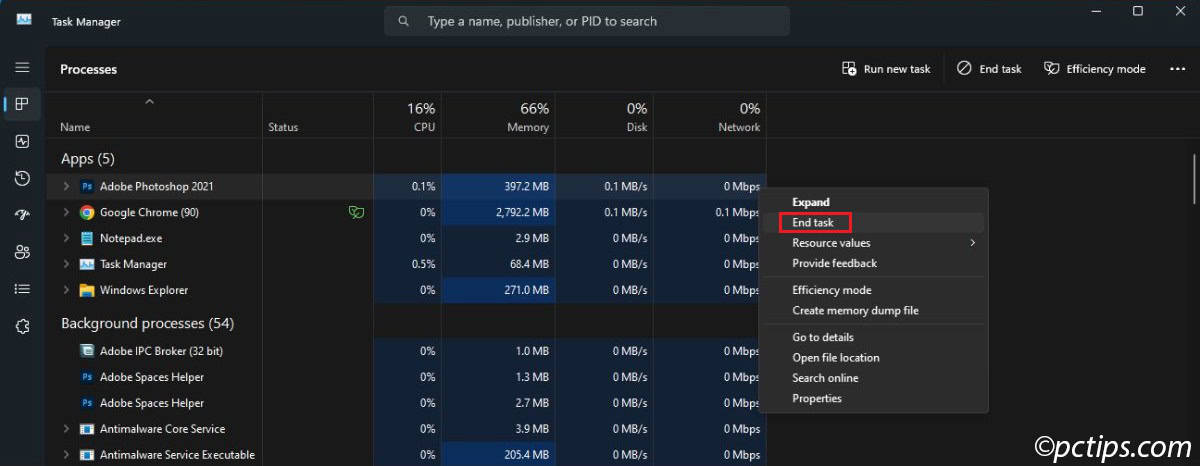
- Press Ctrl + Shift + Esc to open Task Manager
- Click the “Processes” tab
- Look at the “CPU” and “Memory” columns to identify resource-hungry programs
- Select programs you don’t need and click “End task”
Be careful with Task Manager! Don’t close anything you don’t recognize — it might be important for Windows to function properly.
When in doubt, leave it alone.
Which programs are safe to close?
- Web browsers (if you’re not using them)
- Media players
- Games
- Photo editing software
- Chat applications
- Streaming apps like Spotify or Netflix
Which programs to leave alone:
- Anything with “Windows” or “Microsoft” in the name
- Antivirus software (unless you’re temporarily disabling it as mentioned earlier)
- Programs you don’t recognize
A Few Tips Before I Go
- Start with SSD upgrades for maximum impact. This change will make everything on your computer faster, not just file transfers.
- Always use USB 3.x ports for external drives. Look for blue plastic inside the port. This simple check can triple your transfer speeds.
- Add USB 3.0 ports to older desktops. If your computer only has USB 2.0 ports, a USB 3.0 PCIe expansion card costs $15-25 and adds multiple high-speed ports.
- Test Robocopy with non-critical files first. Practice the command with disposable files before transferring important data.
- Check drive health before major transfers. Run chkdsk /f periodically, especially before moving large amounts of important data.
- Never force-close Robocopy operations. Use Ctrl+C in the command window rather than clicking the X button to prevent file corruption.
- Monitor system temperature during intensive transfers. If your computer gets unusually hot, take breaks between large transfers.
Wrapping Up
Slow file transfers are one of those everyday frustrations that most people just accept.
But as you’ve seen, Windows 11 has plenty of built-in solutions and simple tweaks that can make a real difference.
The next time you’re faced with a long file transfer, you’ll know exactly what to do.
Pick the method that fits your situation, and watch those progress bars move much faster.
Your computer is capable of much more than you probably realized.
These techniques just help you unlock that potential.
Drop a comment and let me know which tip worked best for you, or if you’ve discovered any other tricks for speeding up file transfers.
I’d love to hear about your results.