The Ultimate Guide to Using Snipping Tool
Last Updated:
The Windows Snipping Tool is one of the most useful utilities you already have on your PC right now.
This powerful screen capture tool does far more than just take basic screenshots.
Many users overlook its capabilities, but I’ve found it invaluable for both work and personal use.
Let me show you why the Snipping Tool is genuinely worth mastering:
- It lets you capture exactly what you need—specific areas, entire windows, or full screens
- You can annotate, highlight, and draw directly on your capture
- The built-in text extraction feature pulls text right out of images
- It includes screen recording capabilities for creating quick videos
- It integrates seamlessly with other applications for documentation and presentations
I’ve used dozens of screen capture tools, and the Snipping Tool handles 90% of everyday tasks that most people need.
This guide will show you everything you need to know to transform this underappreciated utility into one of your most-used productivity tools.
Let’s turn you into a Snipping Tool pro!
Finding and Opening the Snipping Tool
Before we dive into the details, let me show you how to access the snipping tool:
- Click the Start button or press the Windows key
- Type “Snipping Tool” in the search box
- Click on the Snipping Tool app that appears
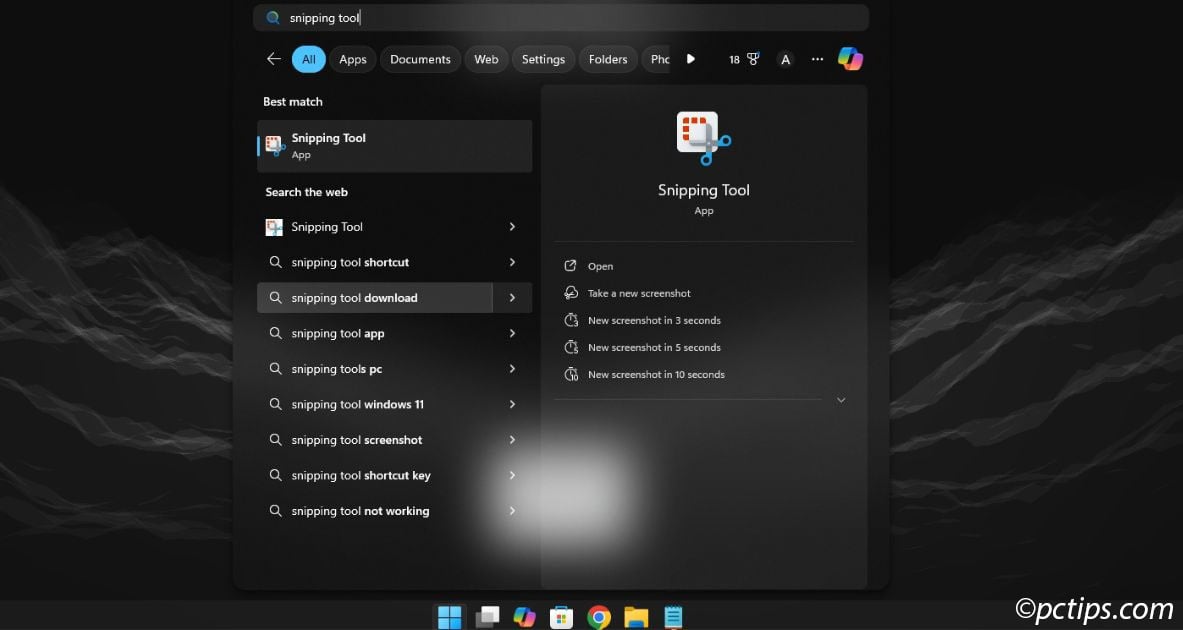
Alternatively, you can use the keyboard shortcut Windows key + Shift + S to open the snipping menu directly.
It is my preferred way to open it—it’s a serious time-saver.
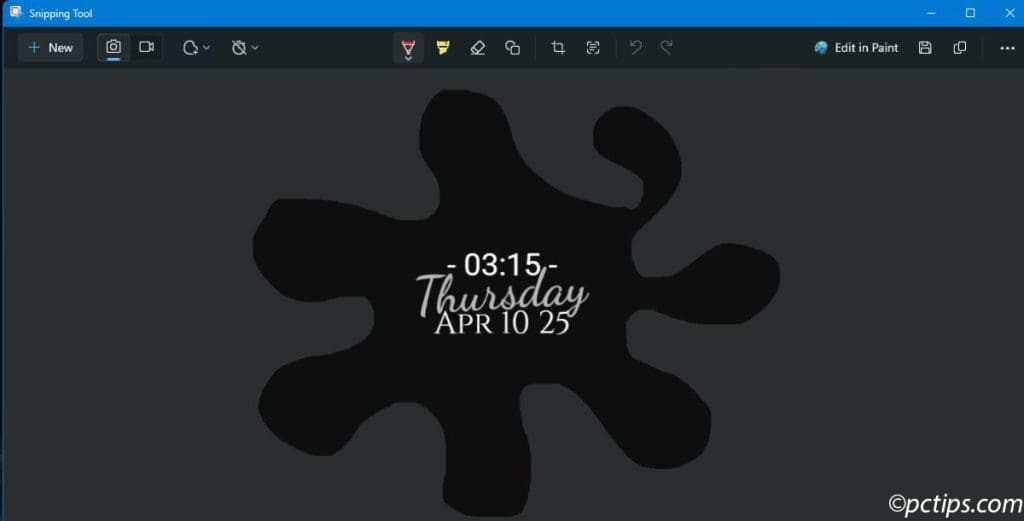
Once open, you’ll see a simple interface with a couple of main buttons: one for taking screenshots (labeled “New”) and another for recording your screen (the video camera icon).
How to Take A Screenshot
Let’s start with the fundamentals.
There are actually several different ways to capture your screen, and each serves a different purpose.
- Open the Snipping Tool application
- Click the “New” button
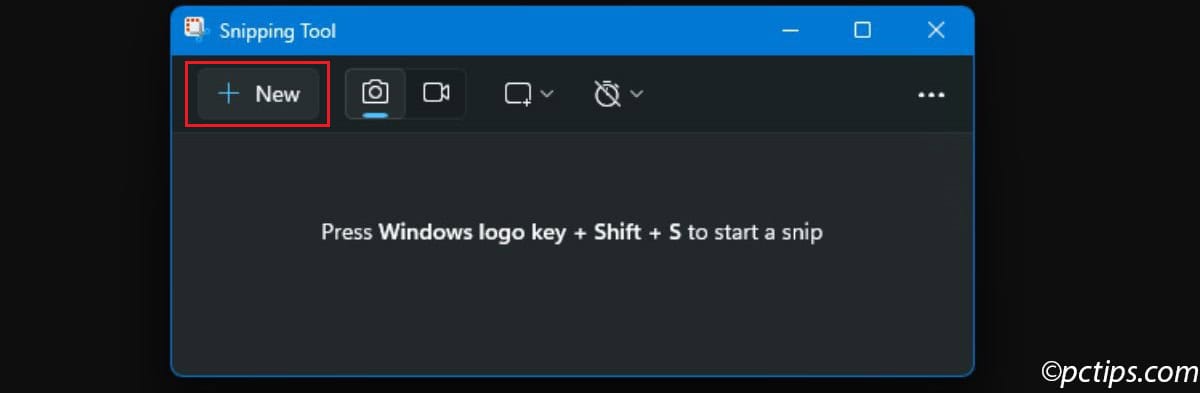
- Your screen will dim slightly, and your cursor will change to a crosshair
- Click and drag to select the area you want to capture
- Release, and you’ve got your snip!
Remember: When you take a screenshot, the image isn’t automatically saved anywhere.
It opens in the Snipping Tool editor where you can annotate it, copy it, or save it as a file.
Snipping Modes Explained
One size definitely does not fit all when it comes to screenshots.
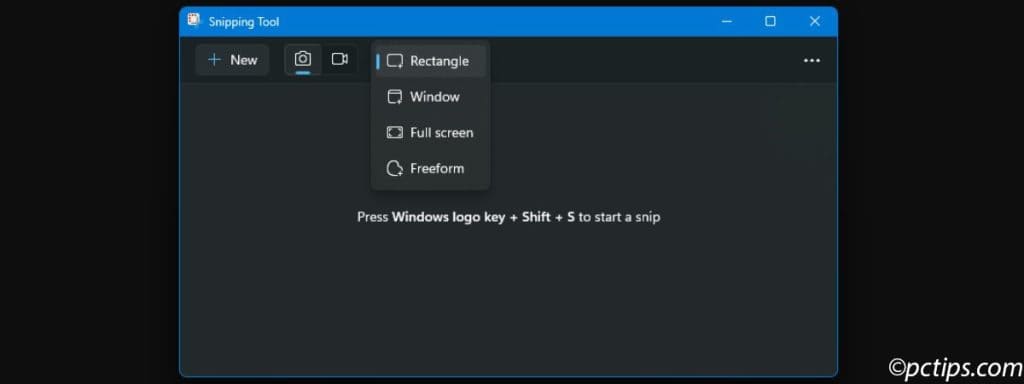
That’s why Snipping Tool offers four different capture modes:
Rectangle Mode: The default and most common option.
Click and drag to create a rectangle around exactly what you want to capture.
Perfect for grabbing specific content while excluding everything else.
Window Mode: Captures an entire window with a single click—no more trying to perfectly drag around the borders!
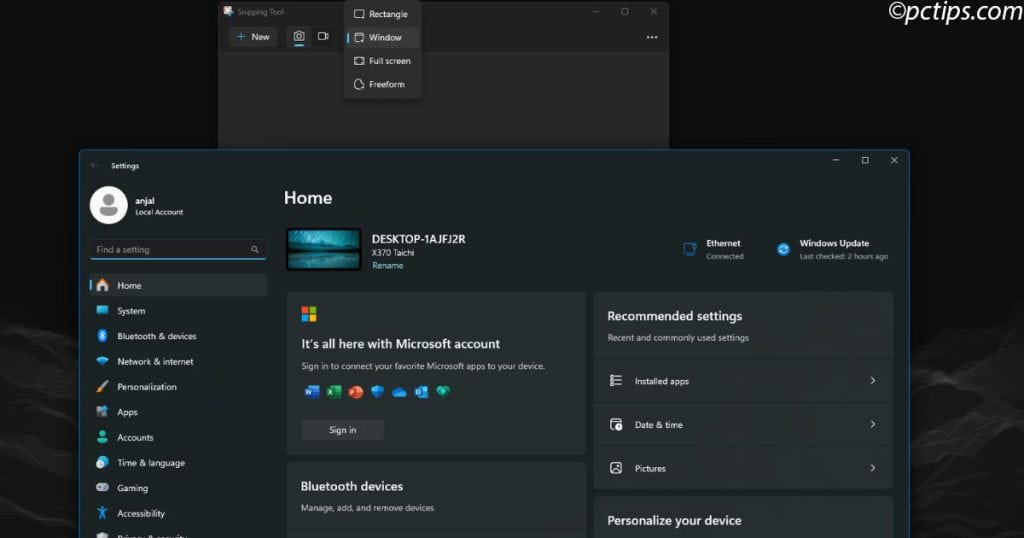
Just select this mode, then click on any open window you want to capture.
The tool automatically grabs the entire window with perfect edges.
Full-screen Mode: Captures everything displayed across your entire screen (or screens, if you have multiple monitors).
It’s like using Print Screen, but with all the Snipping Tool’s editing features afterward.
Free-form Mode: The artistic option!
This lets you draw any shape you want with your cursor, and it captures only what’s inside your drawn line.
Great for emphasizing specific elements or creating more dynamic-looking captures.
To switch between these modes:
- Click the dropdown menu next to “Mode” in the Snipping Tool
- Select your preferred capture style
- Click “New” to start your capture
Pro Tip: Free-form mode is fantastic for product images where you want to remove the background or focus on an irregularly shaped object!
How to Set a Delay Timer
Sometimes you need to capture something that only appears briefly like dropdown menus, tooltips, or hover effects.
This is where the delay feature comes in handy.
Instead of frantically trying to open the tool and capture something before it disappears, you can:
- Open Snipping Tool
- Click the “Delay” dropdown
- Select a delay time (3, 5, or 10 seconds)
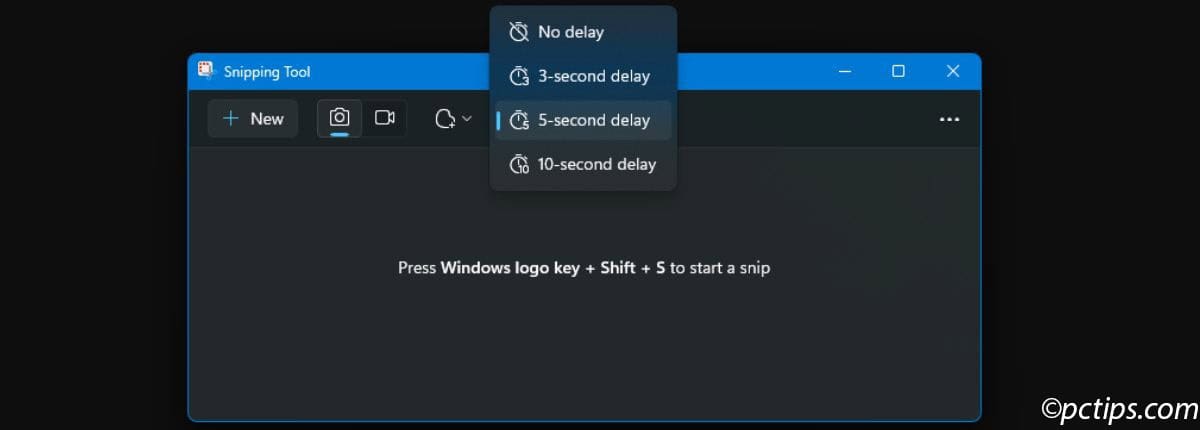
- Click “New”
- Quickly set up whatever you need to capture
- Wait for the timer, and the screen will freeze for your snip!
I use this ALL THE TIME for capturing those pesky menus that disappear when you click elsewhere.
Set a 5-second delay, click “New,” then open the menu you want to capture.
The Snipping Tool will activate after your chosen delay, giving you time to prepare the perfect shot.
Editing and Annotating Your Screenshots
Now we’re getting to the good stuff!
Once you’ve captured your screenshot, the Snipping Tool opens it in an editing window where you can mark it up before saving or sharing.
Highlighting Important Elements
Need to draw attention to specific parts of your screenshot?
The highlighter tool is perfect for this:
- Click the highlighter icon in the toolbar
- Select your preferred color from the palette that appears
- Adjust the thickness if needed using the slider
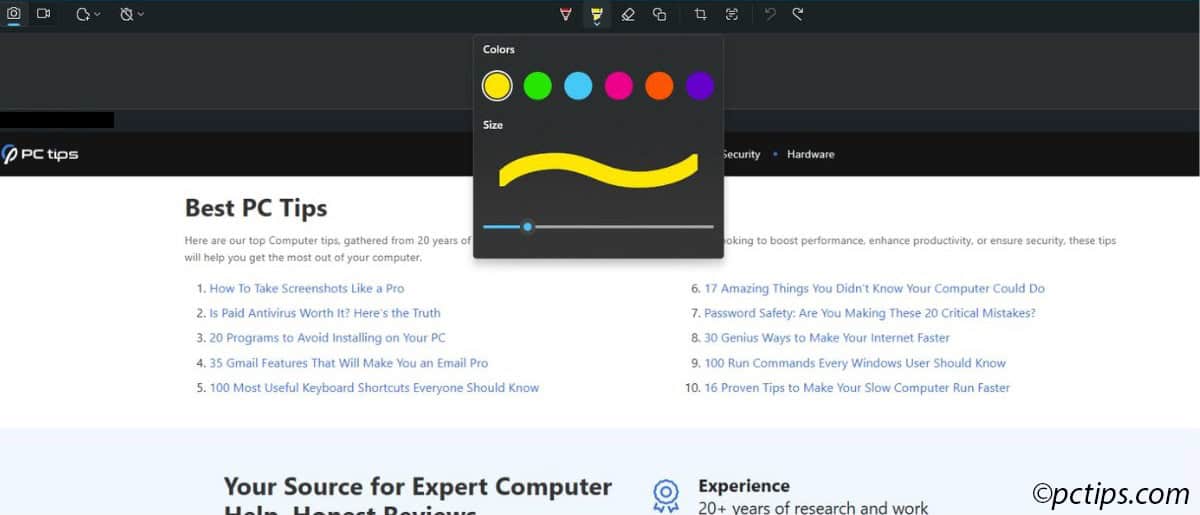
- Click and drag across the text or area you want to highlight
The semi-transparent color makes text remain readable while clearly standing out.
I prefer yellow for most highlights.
Bright colors like pink or green can be helpful when creating multiple highlighted sections that need to be distinguished from each other.
Drawing Using Ballpoint Pen Tool
The ballpoint pen tool lets you draw freehand on your screenshot.
To use it:
- Click the ballpoint pen icon
- Select a color from the palette
- Adjust the thickness using the slider
- Draw directly on your screenshot
You can use this to:
- Add handwritten notes
- Create custom marks or indicators
- Highlight irregular shapes that don’t fit standard tools
- Draw your own arrows or lines with unique angles
Quick Tip: Made a mistake? Click the “Undo” button (the curved arrow) or press Ctrl+Z to remove your last annotation.
Creating Perfect Shapes With Shape Tools
Sometimes freehand drawing looks too messy.
That’s where the shapes tool comes in:
- Click the shapes icon (it looks like a square)
- Choose the shape you want (rectangle, oval, or line)
- Select your outline color and thickness
- Choose whether to add a fill color
- Click and drag to create your shape
The shapes tool is perfect for:
- Drawing circles around important elements
- Creating perfectly straight underlines beneath text
- Adding arrows that point to specific features
- Making boxes to frame important content
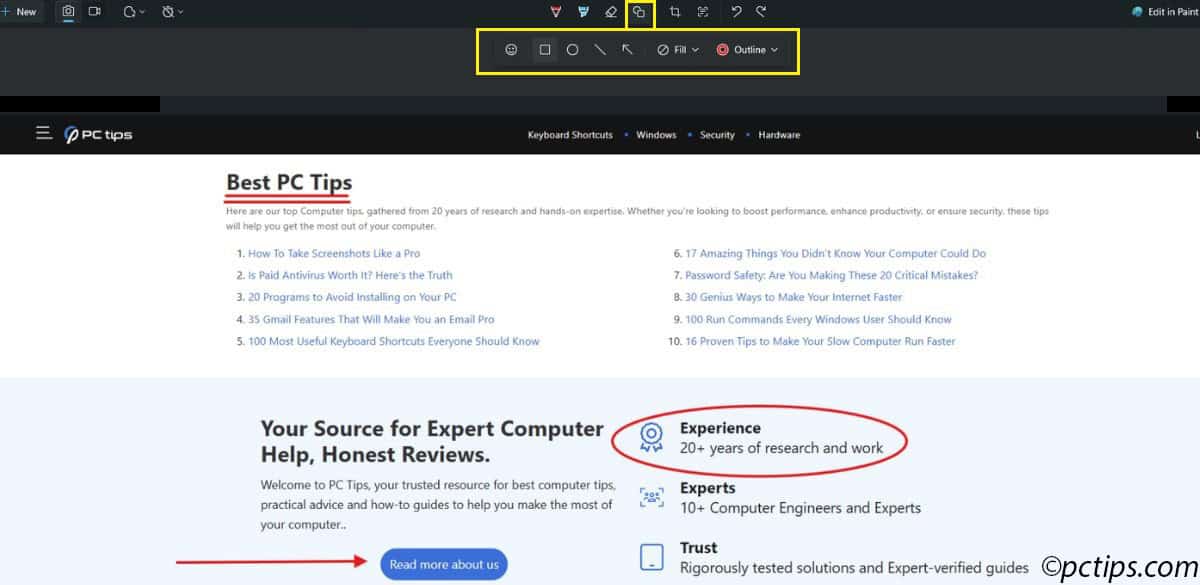
The ability to adjust opacity for both the outline and fill gives you incredible flexibility.
For example, I often create red outlines with no fill to circle important buttons, or low-opacity yellow fills with thin black borders to highlight entire sections.
Beyond shapes and lines, the Snipping Tool also offers ways to add more personality to your annotations.
While limited, the Snipping Tool does offer some emoji options that can add visual interest to your screenshots.
You can:
- Click on the shapes icon
- Select the emoji option
- Choose from the available emojis to add visual markers
It is somewhat limited right now, it’s still useful for adding visual markers.
Microsoft will likely expand this feature in future updates.
The Eraser Tool
Made a mistake? No problem!
The eraser tool lets you remove any annotations you’ve added.
It’s as simple as clicking the eraser button and then clicking on the mark you want to remove.
How to Copy Text Directly from Screenshots
Here’s a game-changer most people don’t know about: Snipping Tool can actually extract TEXT from your screenshots!
Let’s say you’ve captured an image that contains text.
Instead of retyping all that text:
- Take your screenshot as normal
- Click on the “Text actions” button in the toolbar
- Select “Copy text”
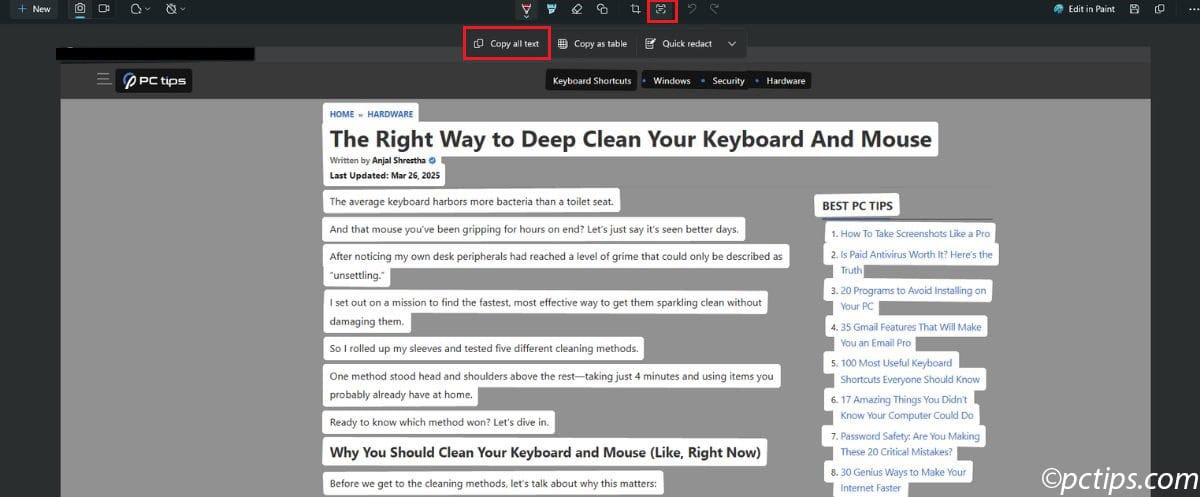
- All readable text from your screenshot is now on your clipboard!
- Paste it anywhere you need (document, email, chat)
I tested this feature extensively, and it works AMAZINGLY well on clear, standard fonts.
It’s less reliable with decorative fonts or very small text.
Automatic Redaction
Sharing screenshots that contain sensitive information?
The Snipping Tool has you covered with its redaction feature:
- Take your screenshot
- Click “Text Actions”
- Select “Quick redact”
- The tool will automatically detect and redact (black out) email addresses and phone numbers
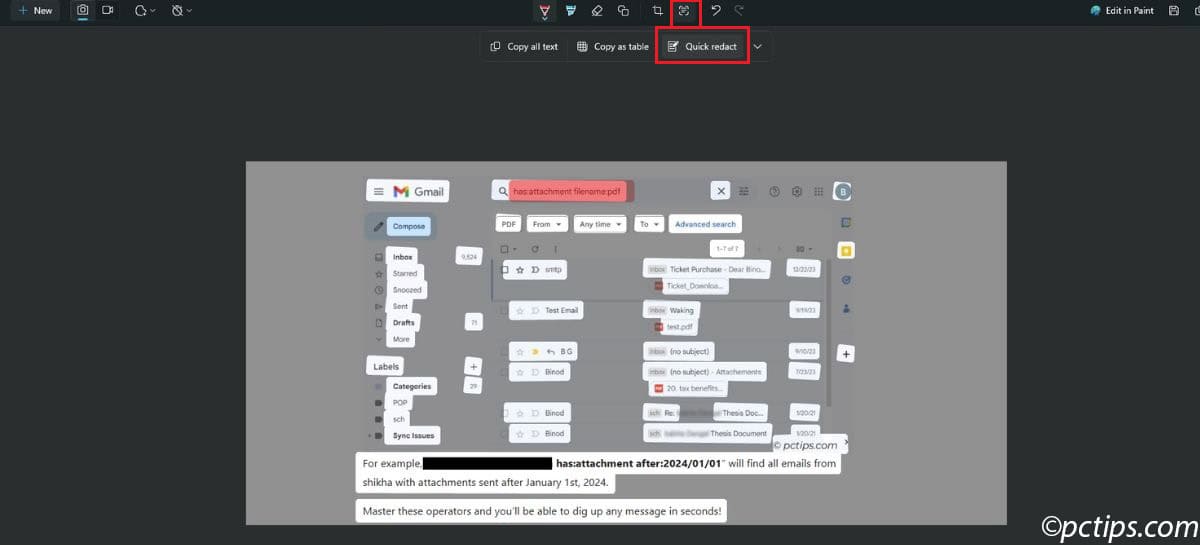
This is a serious time-saver for privacy protection!
Recording Your Screen as a Video
The newest versions of Snipping Tool have added an incredible feature that transforms it from a simple screenshot tool to a complete screen capture solution: video recording!
To record your screen:
- Open Snipping Tool
- Click the “Record” button (looks like a video camera)
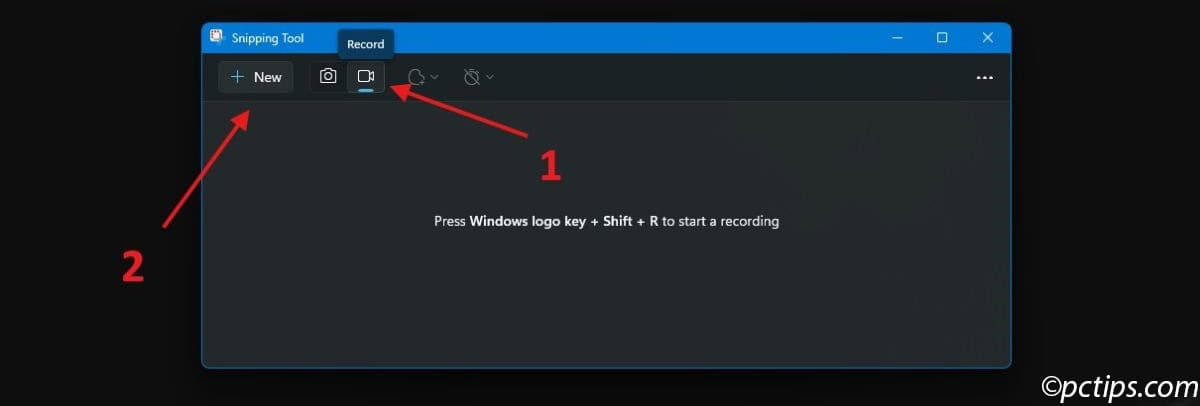
- Select the area of your screen you want to record
- Click “Start recording”
- Click “Stop recording” when finished
The recording is saved and automatically opens for review.
It creates fairly small files, making them perfect for sharing quick demonstrations via email or messaging apps.
Remember: This isn’t for creating professional-quality videos
But for quickly showing someone how to complete a task? It’s PERFECT.
Cropping Tools
Sometimes you realize after taking a screenshot that you included too much.
Rather than starting over, use the cropping tool:
- Click the crop button in the editor
- Adjust the borders to select just the area you want to keep
- Click the checkmark to apply the crop
This makes it easy to fine-tune your captures after the fact.
Saving, Sharing, and Customizing Snipping Tool
Once you’ve captured and annotated your screenshot, you have several options:
- Copy to clipboard: Click the copy button to place the image on your clipboard, ready to paste into documents, emails, or chat
- Save as file: Click the save icon to store your creation as an image file (PNG, JPG, or GIF)
- Share directly: Click the three dots in the top right corner, then select “Share” to send your screenshot via email or other apps without saving it first
Pro Tip: When saving, consider using PNG format for screenshots with text or sharp lines, as it provides better quality.
Use JPG for photographs or images with lots of colors to keep file sizes smaller.
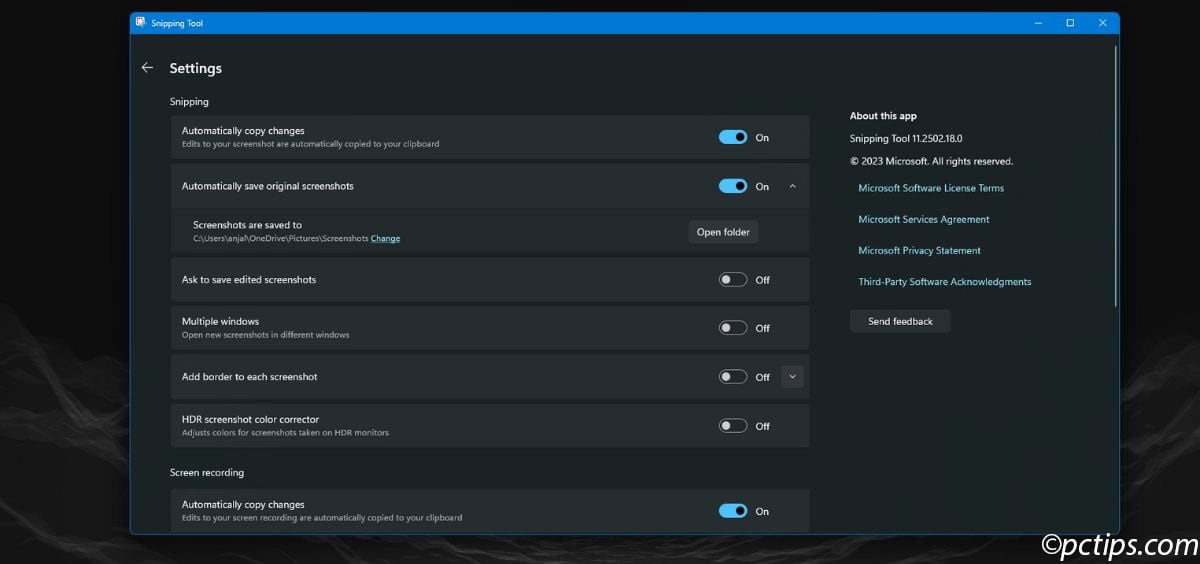
Customizing Your Settings
Like any good tool, Snipping Tool can be tailored to your specific needs through its settings:
- Open Snipping Tool
- Click the three dots in the corner
- Select “Settings”
Here you’ll find toggles for various features:
- Auto-copy to clipboard
- Save snips automatically
- Include audio in recordings
- Show selection border
- And more!
Take a few minutes to explore these settings—customizing them to match your workflow can save you tons of time in the long run.
Summary: Getting the Most Out of Snipping Tool
The Snipping Tool might seem like a simple screen capture utility at first glance.
But as we’ve seen, it’s packed with powerful features that can save you time.
This built-in Windows tool eliminates the need for expensive third-party software for many common tasks.
My advice?
Start using the keyboard shortcut (Windows + Shift + S) today, and gradually explore the annotation and editing features as you need them.
Before long, you’ll be snipping like a pro.
What’s your favorite use for the Snipping Tool?
Have you discovered any tricks I didn’t cover?
What’s your favorite way to use it?
Leave a comment below—I’d love to hear your thoughts.