12 Google Chrome Settings You Should Change Immediately!
Last Updated:
So you’re using Google Chrome.
It’s sleek, it’s fast, it’s reliable and it works pretty well with other Google services.
But here’s the thing — right out of the box, Chrome isn’t configured for optimal privacy, security, or even usability.
Let me walk you through 12 Chrome settings you should change RIGHT NOW.
I’ve been tweaking Chrome settings for a while now, and I’m constantly amazed at how many people are missing out on these game-changing adjustments.
These aren’t just minor tweaks — they’ll make your browser faster, more secure, and frankly, a lot more enjoyable to use.
And the best part?
Every single one takes less than a minute to change.
Ready to make your Chrome better?
Let’s get into it!
1. Block Those Sneaky Third-Party Cookies
You know that feeling when ads seem to follow you around the internet?
Like you looked at one pair of shoes, and suddenly EVERY website is showing you footwear?
That’s third-party cookies in action — little tracking files that monitor your activity across different websites.
While browsers like Firefox and Safari block these trackers by default, Chrome still lets them slide through.
Let’s fix that!
Here’s how to block them:
- Click the three-dot menu icon in the upper right corner of your browser
- Select “Settings”
- In the left sidebar, click on “Privacy and Security”
- Click on “Third-party cookies”
- Select “Block third-party cookies”
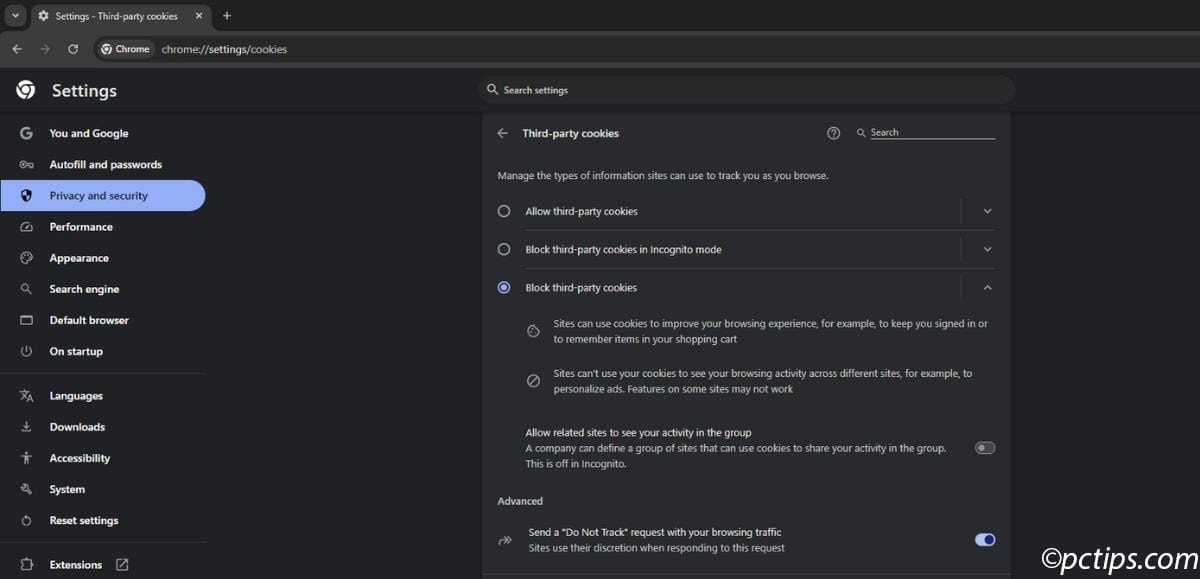
Chrome will warn you that “some features on sites may break” — but don’t worry!
I’ve been blocking third-party cookies for a while now, and I rarely encounter any issues.
And let’s be honest — any “feature” that requires tracking you across the internet probably isn’t one you need anyway.
Quick Tip: While you’re in this section, you might notice a setting called “Send a ‘Do Not Track’ request.”
This sounds useful, but most websites completely ignore this request.
You can turn it on if it makes you feel better, but don’t expect it to do much heavy lifting.
2. Say Goodbye to Annoying Pop-Ups
Remember the early 2000s when every website bombarded you with pop-up windows?
While today’s pop-ups are somewhat less obnoxious, they’re still annoying interruptions that often hide sketchy content or misleading ads.
Chrome can block these nuisances for you — you just need to turn on the setting:
- Stay in the “Privacy and Security” section
- Click on “Site Settings”
- Scroll down to “Content” and select “Pop-ups and redirects”
- Select “Don’t allow sites to send pop-ups or use redirects”

This setting is a double win.
It blocks those irritating pop-up windows and also prevents websites from automatically redirecting you to different pages without your permission.
No more clicking on one link and ending up somewhere completely unexpected!
3. Enable Enhanced Protection for Real-Time Security
Chrome’s standard security is… fine. But “fine” isn’t good enough when it comes to protecting your personal information.
Google now offers Enhanced Protection that uses real-time AI to identify dangerous websites BEFORE they’re even added to Google’s blacklist.
Here’s how to activate this:
- In “Privacy and Security,” click on “Security”
- Look for the “Safe Browsing” options
- Select “Enhanced protection”
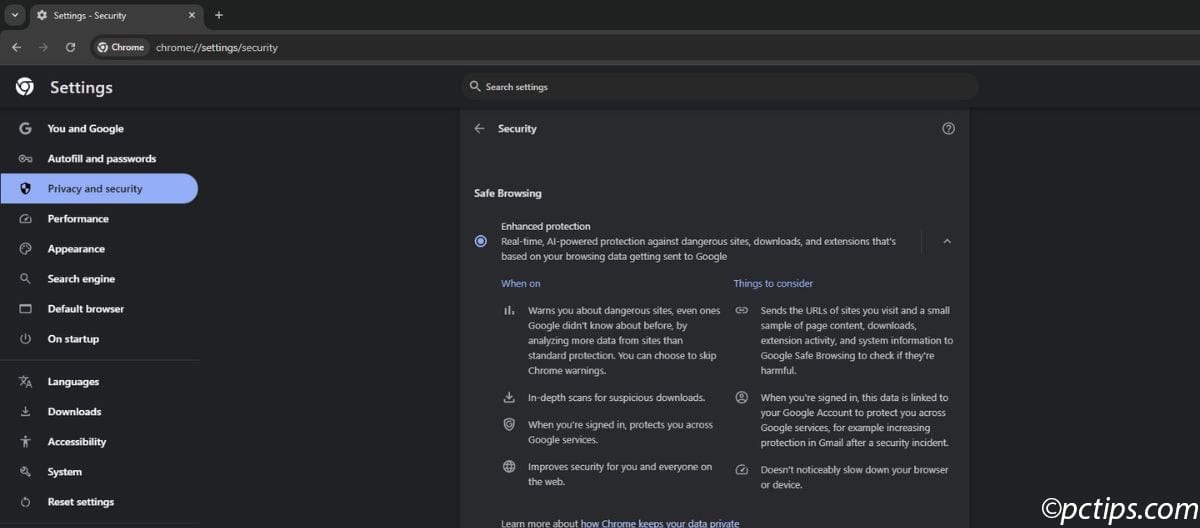
The standard protection (which is the default) only checks websites against a list of known dangerous sites.
Enhanced protection is much more thorough — it actively analyzes websites in real-time to identify new threats.
If you care about your security (and you should!), this is a no-brainer.
4. Use Secure DNS to Keep Your Browsing Private
This one’s a bit more technical, but SUPER important for privacy.
Every time you type a website address into your browser, your PC needs to translate that human-readable name (like “pctips.com“) into a numerical address that computers understand.
This translation happens through something called DNS (Domain Name System).
The problem?
By default, these DNS lookups aren’t encrypted, which means your internet service provider (and potentially government agencies) can see exactly which websites you’re visiting.
Secure DNS encrypts these lookups, adding a significant layer of privacy to your browsing. Here’s how to turn it on:
- Stay in the “Security” section
- Scroll down to “Advanced”
- Toggle on “Use secure DNS”
- Select a DNS provider (I recommend Cloudfare)
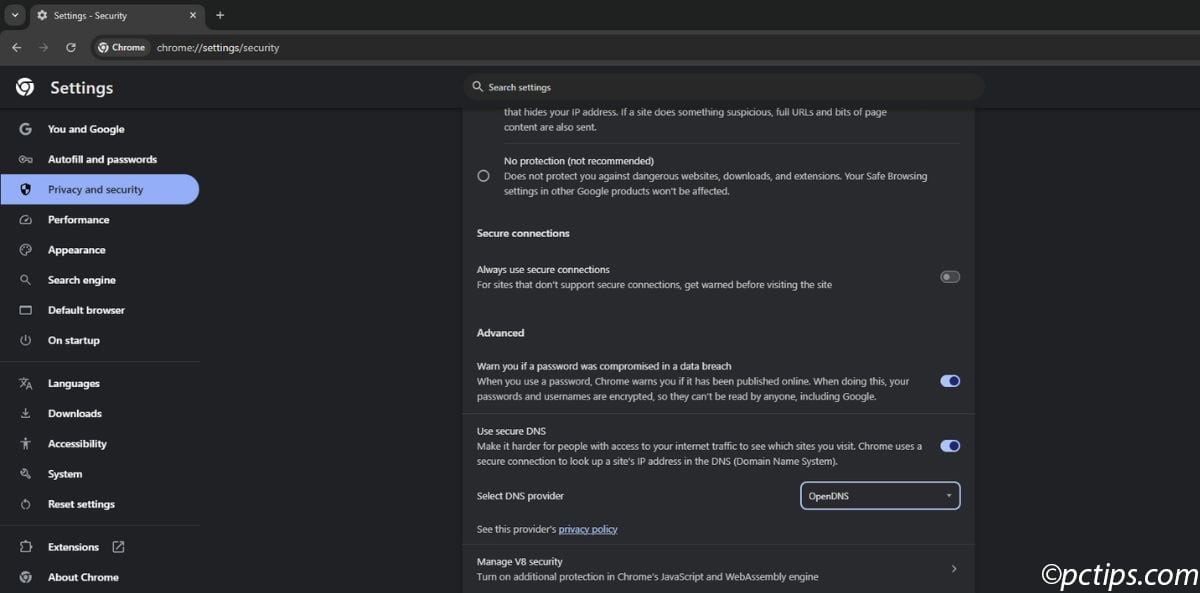
If you’ve already configured secure DNS in your operating system settings, you can select “OS default” instead.
Either way, enabling this setting is an easy win for privacy.
5. Automatically Delete Your Web & App Activity
Google loves data — particularly YOUR data.
By default, Google keeps track of your searches, the websites you visit, and how you use Google apps… forever.
That’s a lot of personal information just sitting in Google’s servers.
You can turn off this tracking entirely, which is the best move for privacy.
But if you rely on personalized Google features (like search suggestions, YouTube recommendations, or tailored maps), a full opt-out might feel too restrictive.
A better compromise?
Set your activity to auto-delete after a short period:
- Go to myactivity.google.com/activity-controls (you’ll need to be signed into your Google account)
- Find “Web & App Activity”
- Click on “Auto-delete”
- Select “Auto-delete activity older than 3 months”
- Confirm your choice

This gives you a healthy balance: enough data for convenience, but not so much that your history lives on forever.
Pro Tip: If privacy is your top priority, skip the auto-delete and just turn off Web & App Activity entirely. It limits personalization, but it also sharply reduces how much of your behavior Google can track.
6. Give Chrome a Fresh Look with Custom Themes
Chrome’s default appearance works fine, but it’s pretty bland.
After staring at the same gray interface day after day, a visual refresh can make your browser feel new again.
Chrome offers thousands of themes that can transform your browser’s appearance.
From stunning landscapes to minimalist designs to your favorite movies or shows — there’s something for everyone.
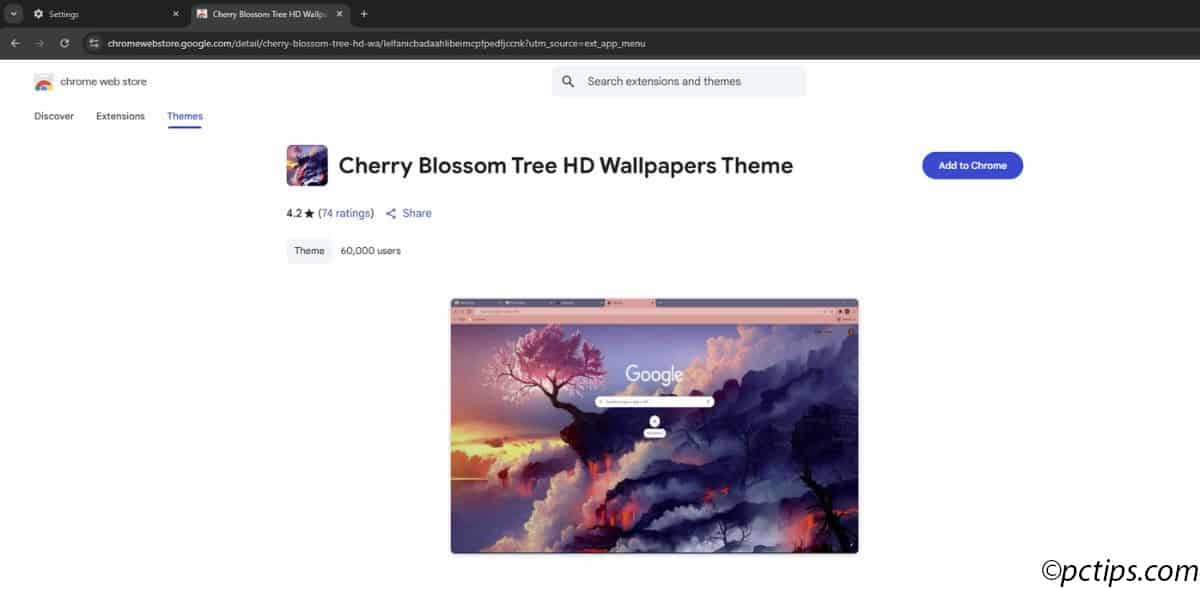
Here’s how to find and install a theme:
- Click the three-dot menu in the upper right
- Hover over “Extensions” and select “Visit Chrome Web Store”
- Select “Themes” in the left sidebar
- Browse the categories until you find something you like
- Click on the theme and select “Add to Chrome”
Don’t like the theme you chose?
No problem! You can always click “Undo” right after installing, or go back to the default theme through Chrome’s settings.
7. Disable Background Apps for Better Performance
Did you know Chrome can keep running apps in the background even after you close the browser?
This can drain your battery, use up system resources, and potentially slow down your computer.
If you want Chrome to actually quit when you quit, here’s how to change this setting:
- Go to Settings
- Select “System” from the left sidebar
- Toggle off “Continue running background apps when Google Chrome is closed”

While you’re in this section, you might also want to enable the option to “Use hardware acceleration when available.”
This setting lets Chrome use your computer’s graphics processor for graphics-heavy tasks, which can improve performance and free up CPU resources.
If Chrome seems sluggish on your computer, turning this on might help!
8. Switch Your Default Search Engine
Here’s something many people don’t realize: you’re not stuck with Google Search just because you’re using Google Chrome.
Chrome actually makes it easy to switch to alternative search engines that might better suit your needs:
- In Settings, select “Search engine” from the left sidebar
- Click on “Search engine used in the address bar”
- Choose from options.
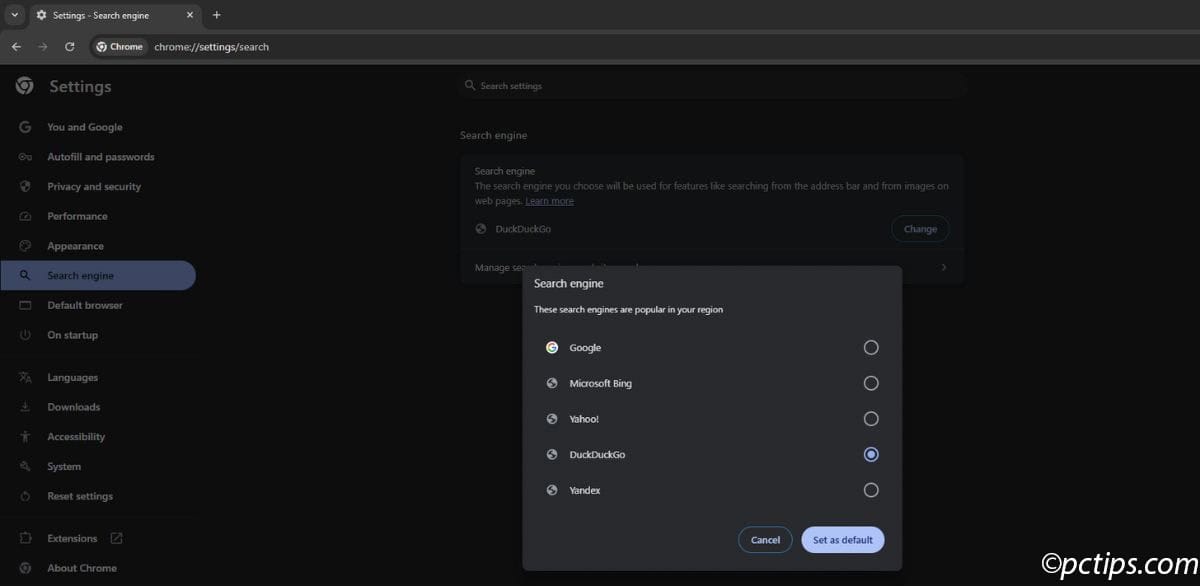
I personally recommend DuckDuckGo if privacy is important to you.
Unlike Google, DuckDuckGo doesn’t track your searches or create a profile based on your browsing habits.
It’s a refreshing change if you’re tired of personalized search results and targeted ads!
9. Allow Extensions in Incognito Mode
Incognito mode is great for private browsing, but by default, Chrome disables all extensions when you’re in incognito.
This makes sense from a privacy perspective — some extensions might track your activity — but it can be frustrating if you rely on certain extensions all the time.
Thankfully, you can enable specific extensions to work in incognito mode:
- Click the “Extensions” icon in your toolbar
- Select “Manage Extensions”
- Find the extension you want to use in incognito
- Click “Details”
- Toggle on “Allow in incognito”
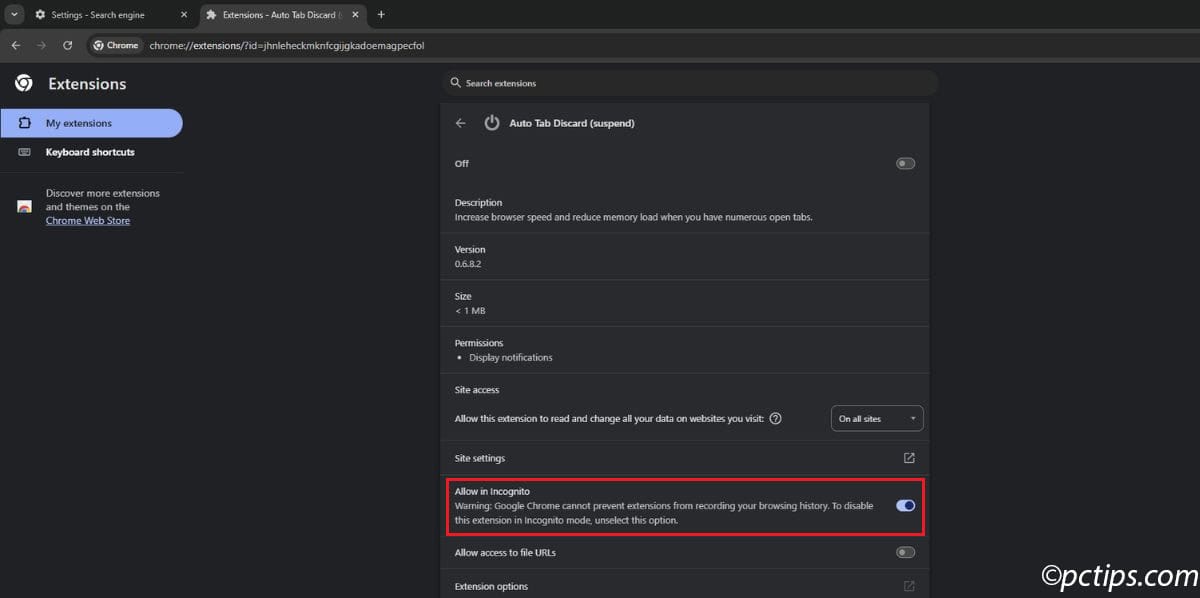
Just be selective about which extensions you enable!
Only choose ones you truly trust, as they’ll have access to your private browsing activity.
10. Shrink Your Bookmarks for More Space
If your bookmarks bar is getting crowded, here’s a brilliant space-saving trick: remove the text and just keep the icons!
For most websites, the favicon (that little icon) is distinctive enough that you don’t need the text label.
By removing the text, you can fit many more bookmarks in the same space.
Here’s how to do it:
- Right-click on a bookmark in your bookmarks bar
- Select “Edit”
- Delete the name (it will be automatically highlighted, so just hit Delete)
- Click “Save”
Repeat for all your frequently used bookmarks, and watch how many more you can fit on the bar!
You’ll still see the full name when you hover over the icon, so you won’t lose any information.
11. Activate Reading Mode for Distraction-Free Articles
Chrome FINALLY has a reading mode similar to what Firefox and Safari have offered for years.
This feature strips away ads, sidebars, and other distractions, leaving you with just the text and essential images.
It is perfect for actually reading content without your attention being pulled in ten different directions.
To use reading mode:
- Navigate to an article you want to read
- Right-click anywhere on the page
- Select “Open in reading mode”
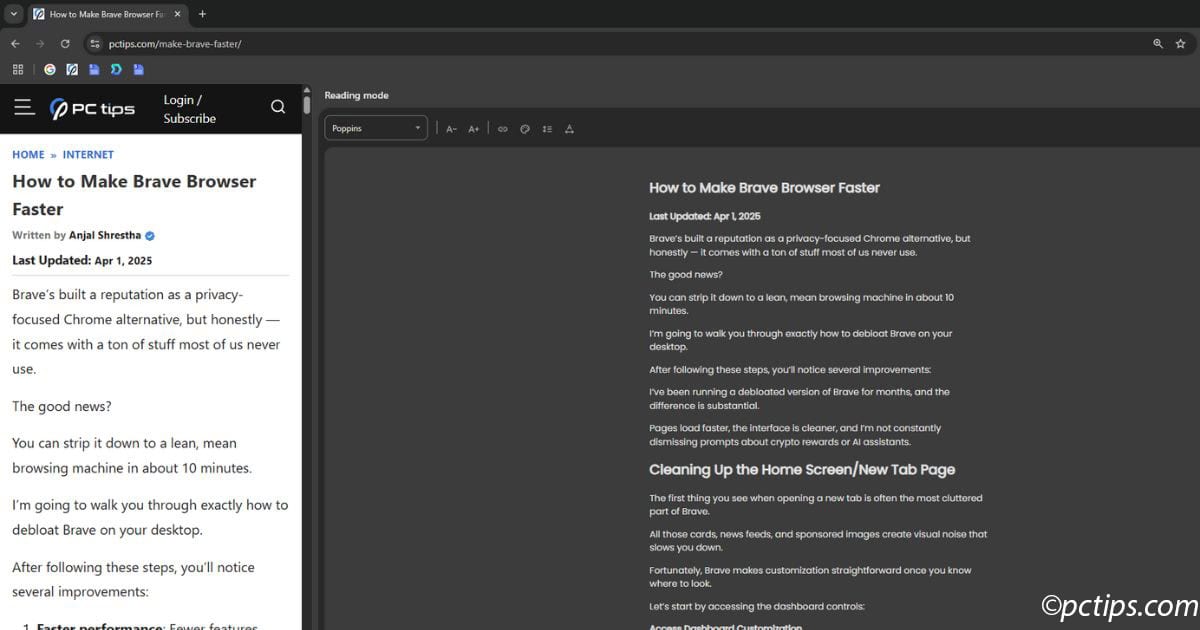
Once in reading mode, you can customize your reading experience by:
- Choosing different fonts
- Adjusting text size
- Changing the theme (light, dark, or sepia)
- Modifying line height and letter spacing
This feature is AMAZING for long articles or websites with cluttered designs.
12. Enable Live Caption for Automatic Subtitles
This last setting is a game-changer for accessibility.
Chrome’s Live Caption feature automatically generates captions for any audio playing in your browser — whether it’s a YouTube video, a podcast, or music with lyrics.
This is invaluable if you’re hard of hearing, watching content in a noisy environment, or just someone who processes information better through text.
Here’s how to turn it on:
- In Settings, select “Accessibility” from the left sidebar
- Toggle on “Live Caption”
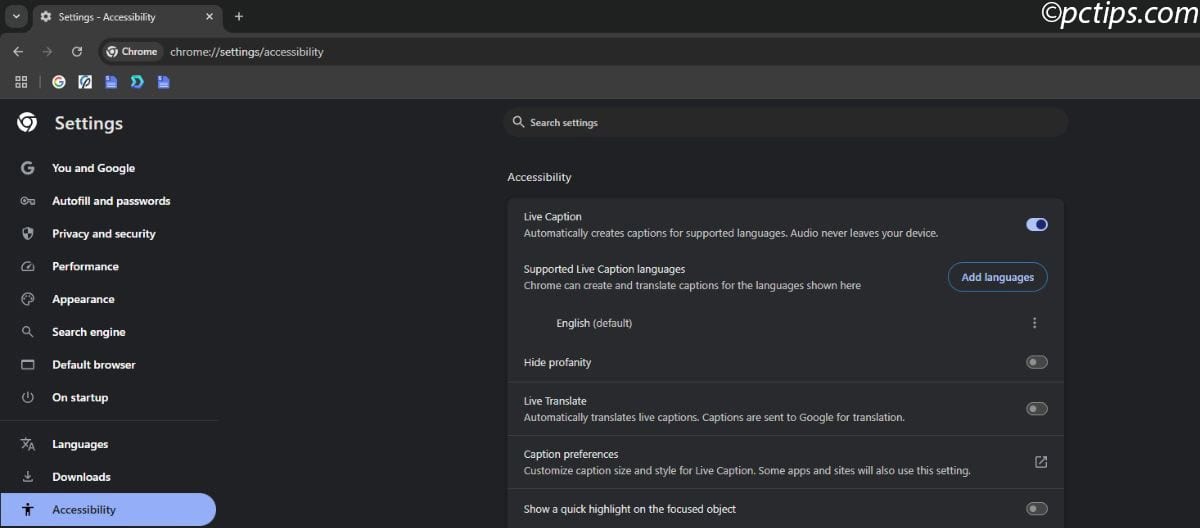
Once enabled, Chrome will display captions on your screen whenever audio is playing in any tab.
You can customize the caption appearance, hide profanity if desired, and even translate captions into different languages in real-time.
A Better Chrome Experience Awaits
These settings take less than 10 minutes to change, but they’ll dramatically improve your experience using Chrome.
From enhanced privacy and security to better usability and accessibility, these tweaks transform Chrome from a good browser into a GREAT one.
I’ve been using these settings for a while now, and I honestly can’t imagine going back to the default configuration.
Chrome becomes faster, more private, less annoying, and just plain better when properly configured.
So what are you waiting for?
Open up Chrome right now and start making these changes!
What Chrome settings have YOU changed that made a big difference?
Any favorites I missed?
Drop a comment below — I’d love to hear about your Chrome optimization secrets!