5 Methods to Create Local User Account on Windows 11
Last Updated:
Every time you log in with a Microsoft account, Windows 11 quietly sends your activity, preferences, and even file names back to their servers.
Your browsing habits, app usage, and personal settings become part of their data collection machine—all neatly tied to your identity.
But what if you want to:
- Keep your files truly private (no cloud syncing, no tracking)?
- Share your PC without sharing your life (guest accounts that don’t phone home)?
- Break free from constant data harvesting (no activity logs sent to Microsoft)?
Good news: Windows 11 still lets you create local accounts—they just bury the option under layers of “Sign in with Microsoft” prompts.
I’m going to share with you five foolproof ways to bypass the tracking and set up completely offline accounts in minutes.
Why Choose Local Accounts Over Microsoft Accounts?
Microsoft really wants you to use an online account – they’ll ask repeatedly during setup, bury the local option, and even disguise it with confusing wording.
But here’s what they don’t tell you:
- Total Privacy – Local accounts block all automatic activity logging to Microsoft’s servers
- Full Functionality – You keep access to every core Windows feature (just without the surveillance)
- Faster Setup – No email verification or waiting for authentication codes
- Reliable Access – Log in anytime, even without internet
- Complete Control – Your data stays on your device, not synced across Microsoft’s cloud
The difference is simple:
Microsoft Account = Your usage data stored on their servers
Local Account = Everything stays private on your PC
Now let’s break through Microsoft’s barriers.
Here are five proven methods to create local accounts – starting with the easiest approach anyone can use.
Method 1: The Easy Route Through Settings
This is my go-to method for most people.
It uses Settings app with clear menus and buttons you can click through step-by-step.
I’ve walked dozens of folks through this process, and it works every single time.
Here’s exactly what you’ll do:
- Press Windows + I to open Settings.
- Click “Accounts” in the left sidebar.
You’ll see your current account info here, along with options to manage other users. - Scroll down and click “Other Users.”
This is where Windows keeps track of everyone who can use your computer.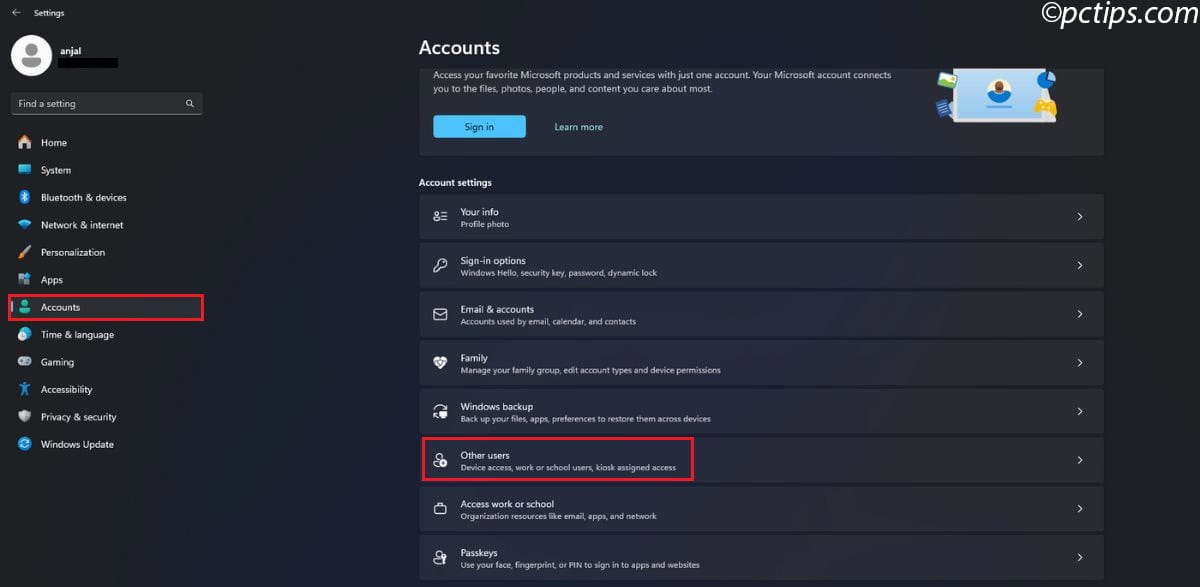
- Next to “Add Other User,” click the “Add Account” button.
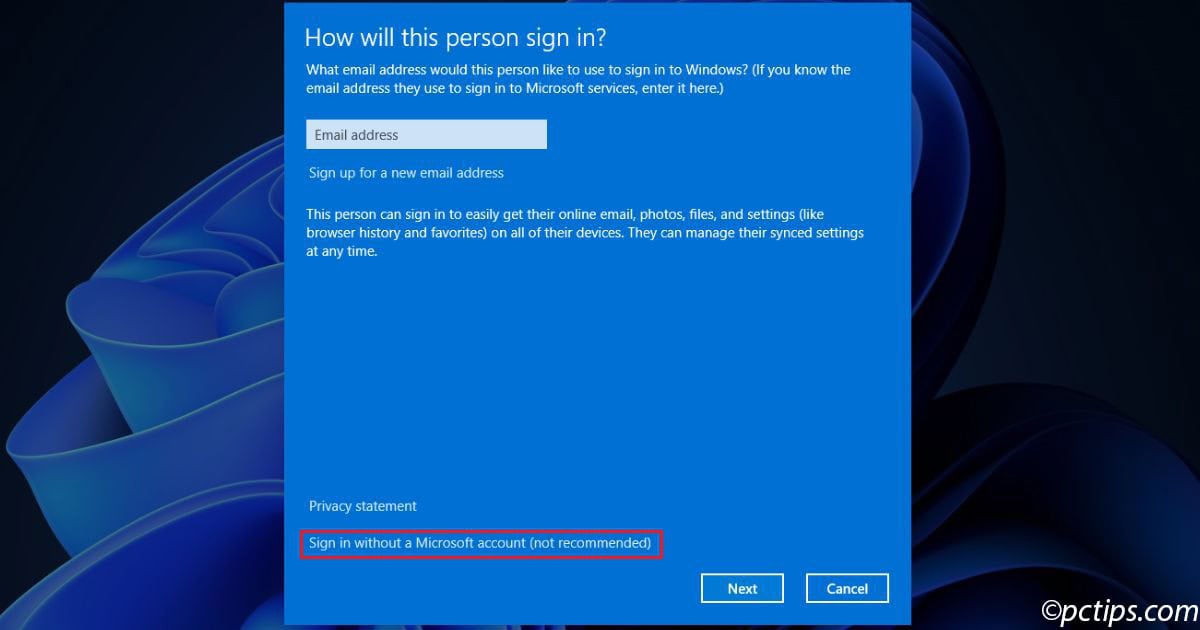
Here’s where Microsoft tries to be sneaky—they’ll immediately show you a Microsoft Account signup window. - Don’t fall for it! Click “I Don’t Have This Person’s Sign-In Information” at the bottom of that window.

- On the next screen, choose “Add a User Without a Microsoft Account.”
See what I mean about them making it hard to find? - Now you fill in these fields:
- Username: Pick something easy to remember but not too personal
- Password: Make it strong but memorable (mix of letters, numbers, symbols)
- Confirm Password: Type it again exactly
- Security Questions: Choose questions you’ll actually remember the answers to
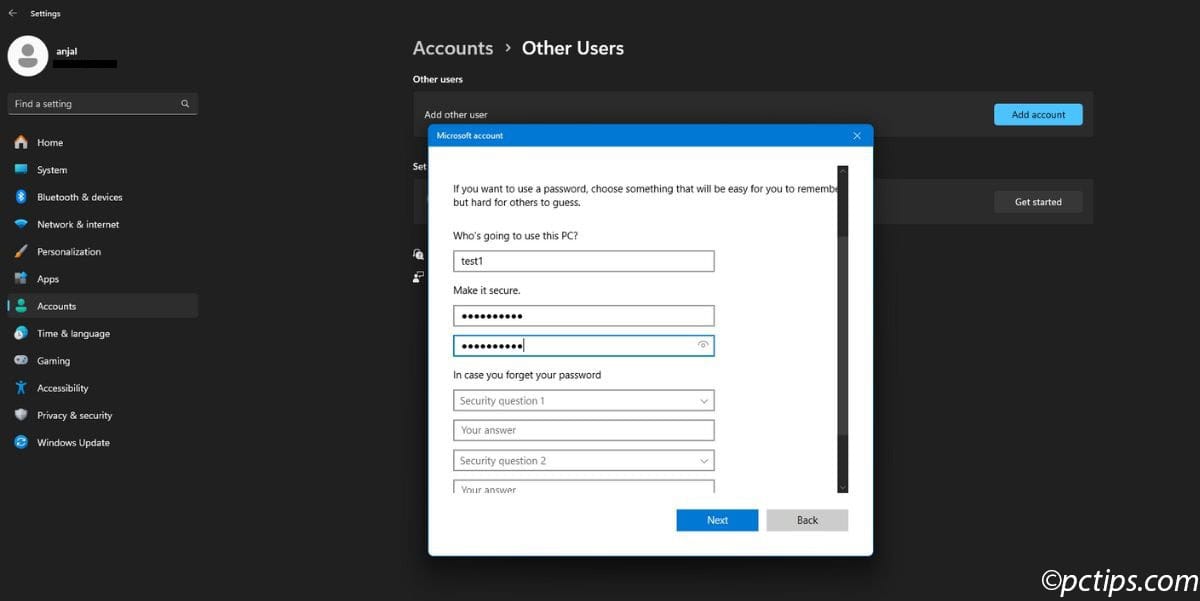
- Click “Next” and boom—you’ve got yourself a brand new local account!
By default, this creates what’s called a “standard account.”
Standard accounts have limited permissions for security.
They can use the computer, install some programs, and change their own settings, but they can’t modify system-wide configurations or access other users’ files.
Want to give them full admin access?
Select the new account, click “Change Account Type,” choose “Administrator” from the dropdown, and hit “OK.” Now they’ve got administrative privileges.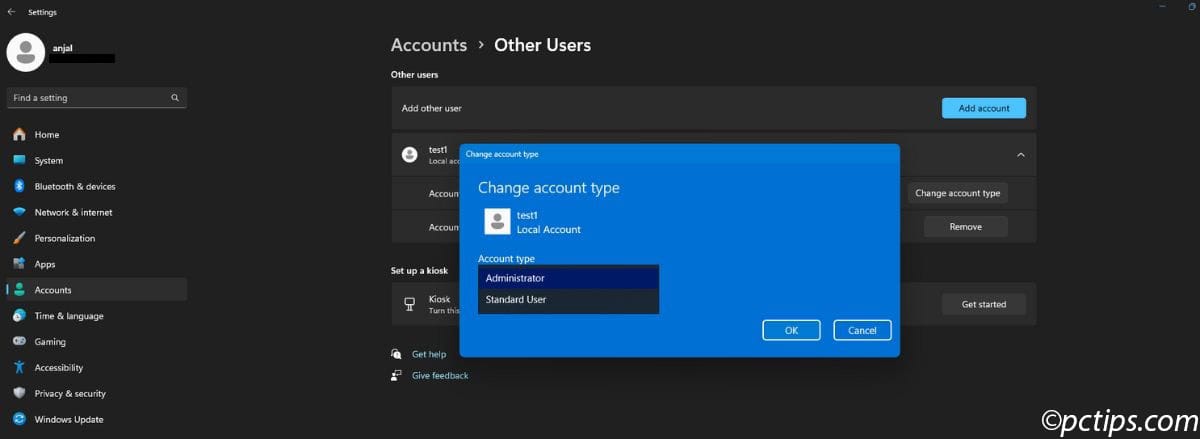
Method 2: Command Prompt
Command Prompt might look intimidating, but it’s actually the fastest way to create user accounts once you memorize the commands.
Plus, you’ll impress anyone watching over your shoulder!
- Press Windows + S to open search, type “Command Prompt,” and select “Run as Administrator.” You need admin privileges for this to work.
- Click “Yes” when Windows asks if you want to allow the app to make changes.
- Type this command, replacing the placeholder text with your actual values:
net user NewUsername NewPassword /add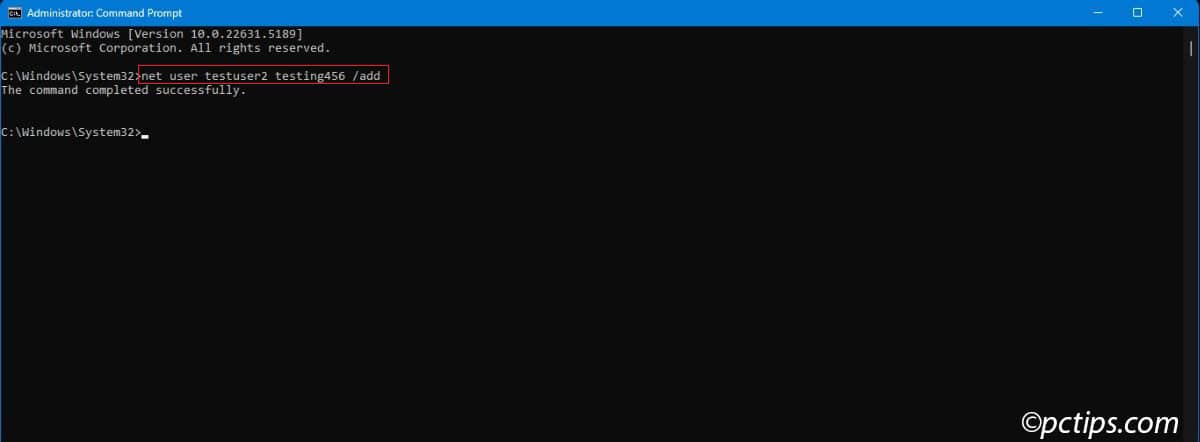
For example: net user JohnDoe SecurePass123 /add
- Press Enter. If everything worked, you’ll see “The command completed successfully.”
- If you need administrator privileges, run this follow-up command:
net localgroup Administrators NewUsername /add
This adds your new user to the Administrators group, giving them full control over the computer.
Remember: Command Prompt is literal. If you misspell the username here, you’ll create an account with the misspelled name. Double-check your typing!
I love this method because it’s so direct.
No clicking through multiple screens, no dodging Microsoft’s marketing messages.
Just two simple commands and you’re done.
Method 3: PowerShell
PowerShell is Microsoft’s newer, more powerful command-line tool.
It uses longer commands (called cmdlets), but they’re more descriptive and harder to mess up.
- Search for “PowerShell” and select “Run as Administrator.” Just like with Command Prompt, you need elevated permissions.
- Accept the User Account Control prompt.
- Type this command (it’s longer but more self-explanatory):
New-LocalUser -Name "NewUsername" -Password (ConvertTo-SecureString "NewPassword" -AsPlainText -Force) -AccountNeverExpires
- Add the user to the standard Users group:
Add-LocalGroupMember -Group "Users" -Member "NewUsername"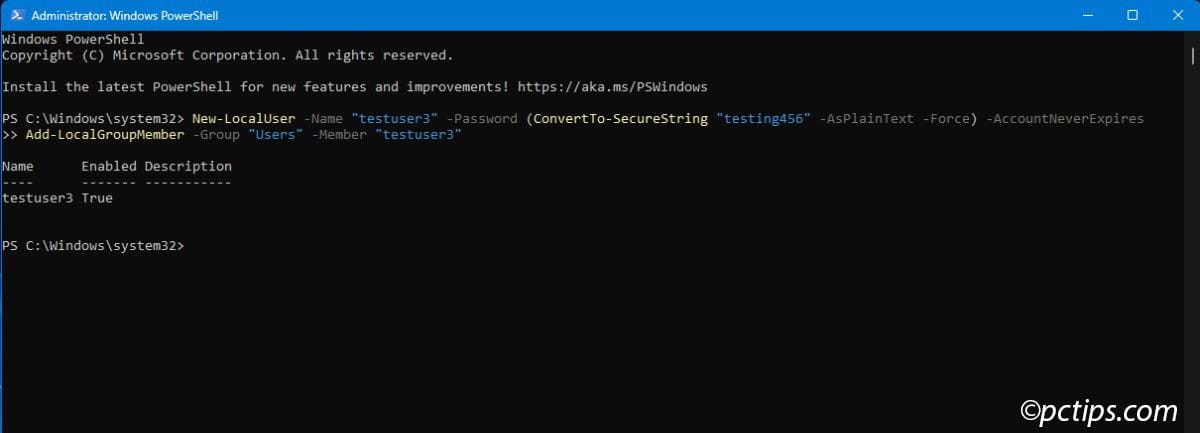
- If you want administrator privileges, run this additional command:
Add-LocalGroupMember -Group "Administrators" -Member "NewUsername"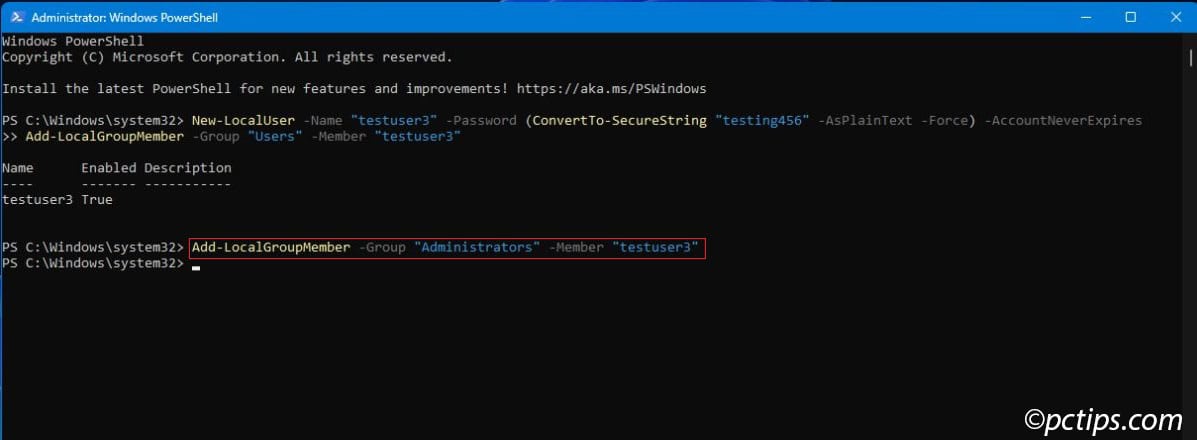
The beauty of PowerShell is in the command structure.
New-LocalUser clearly creates a local user.
ConvertTo-SecureString handles password encryption.
-AccountNeverExpires means the account won’t be disabled due to age.
These commands might look complex, but they’re actually more foolproof than the shorter Command Prompt versions.
PowerShell tells you exactly what each part does.
Method 4: Computer Management
Computer Management offers a graphical interface for system administration tasks.
It’s perfect if you prefer clicking to typing, but there’s one catch: this only works on Windows 11 Pro.
Home edition users won’t see these options.
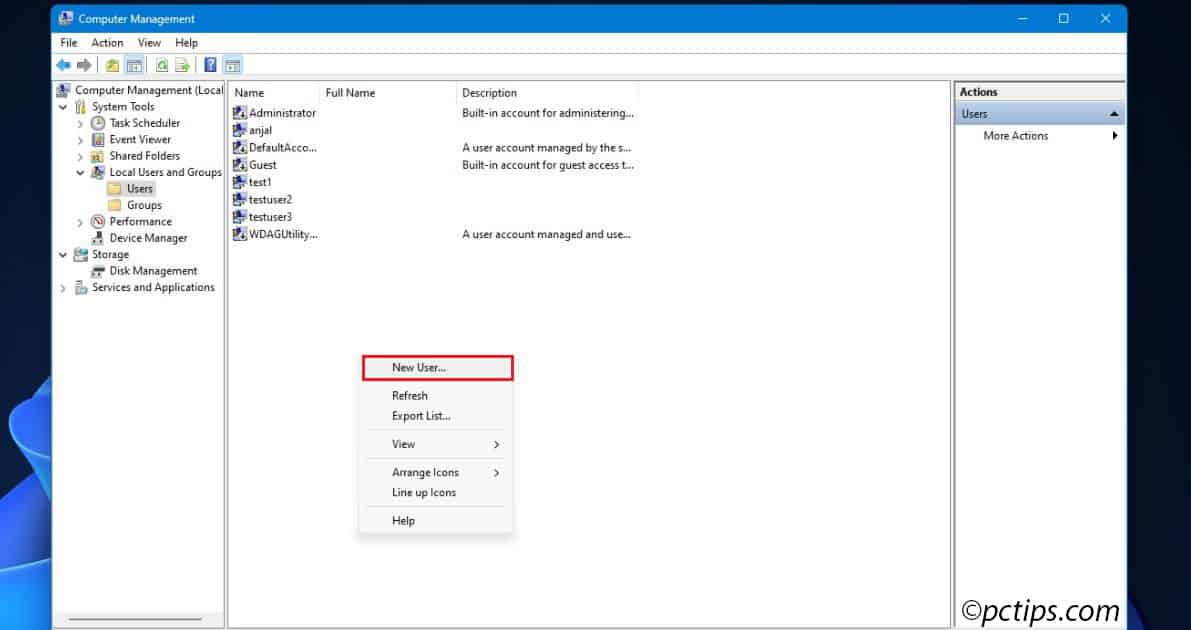
- Search for “Computer Management” and open it.
- Navigate through the left sidebar: System Tools > Local Users and Groups > Users.
- Right-click in the empty space on the right side and select “New User.”
- Fill out the form:
- User name: Choose the account name
- Full name: Optional, but helpful for identification
- Description: Also optional (like “Guest Account” or “Kids Computer”)
- Password: Enter it twice for confirmation
- Uncheck “User must change password at next logon” unless you specifically want that
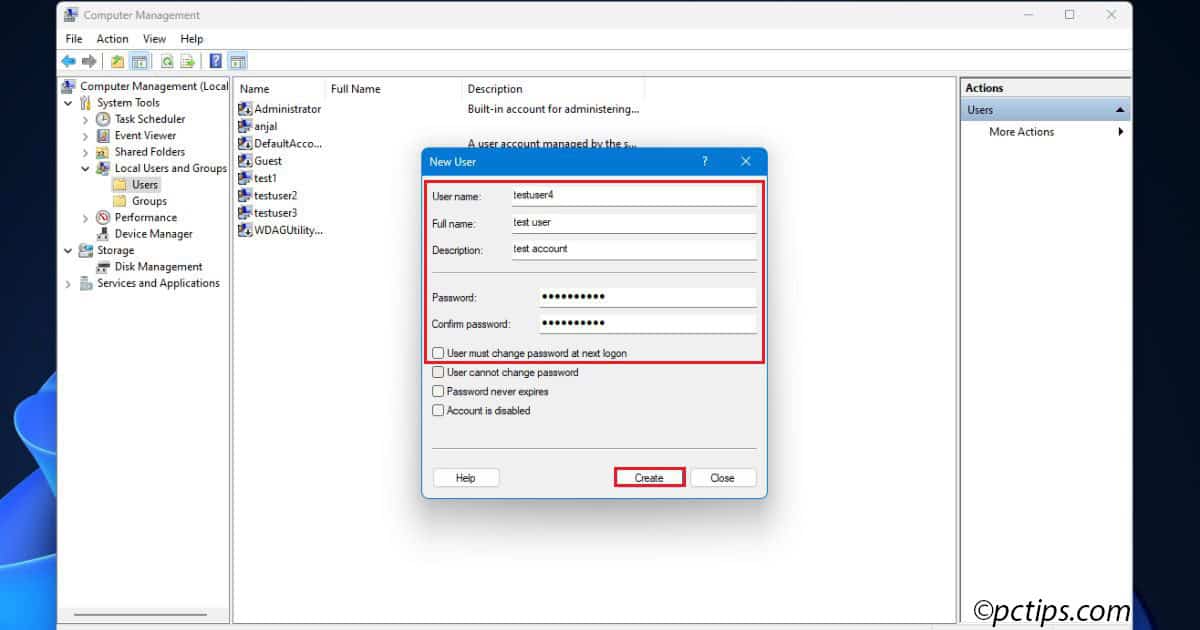
- Click Create to finish.
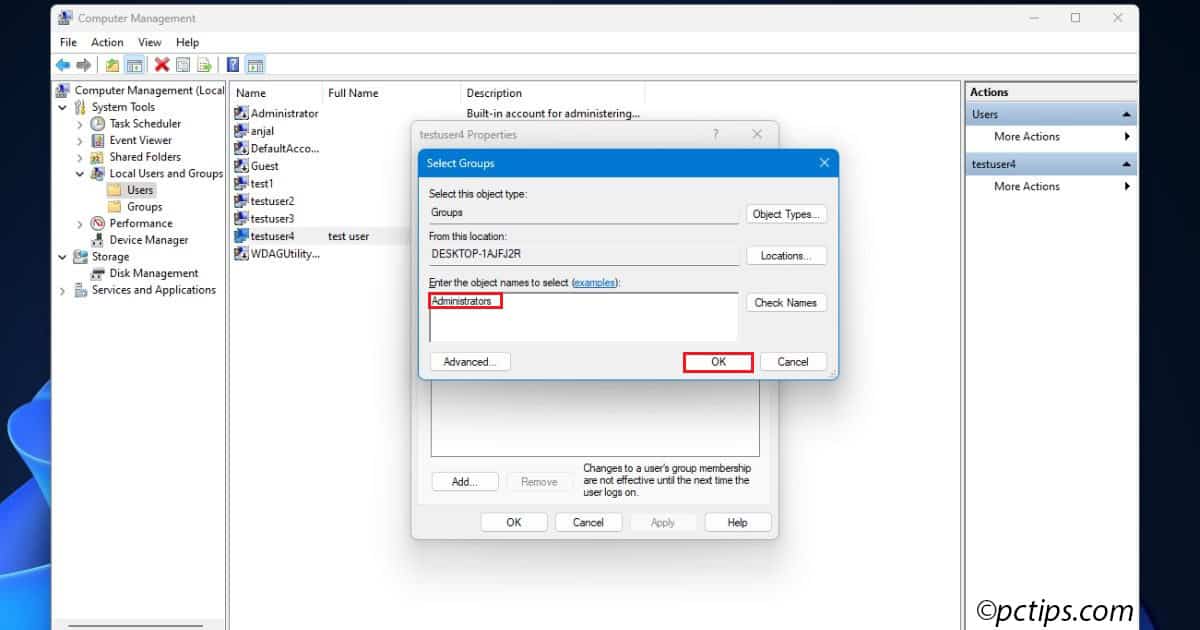
- For administrator privileges, right-click the new account, choose “Properties,” go to the “Member Of” tab, click “Add,” type “Administrators,” and click “OK.”
I particularly like this method because you can see all existing accounts at a glance.
It’s also great for managing multiple accounts since everything’s visual and organized.
Method 5: Netplwiz
Netplwiz (short for Network Places Wizard) is one of Windows’ best-kept secrets.
This utility has been around forever, but Microsoft doesn’t advertise it.
Once you discover it, though, you’ll wonder how you managed without it.
- Press Windows + R to open the Run dialog.
- Type netplwiz and press Enter. No “Run as Administrator” needed here!
- Click Add in the User Accounts window.
- Select “Sign in Without a Microsoft Account (Not Recommended).” Don’t let that warning scare you—it’s just Microsoft’s preference talking.
- Choose “Local Account” on the next screen.
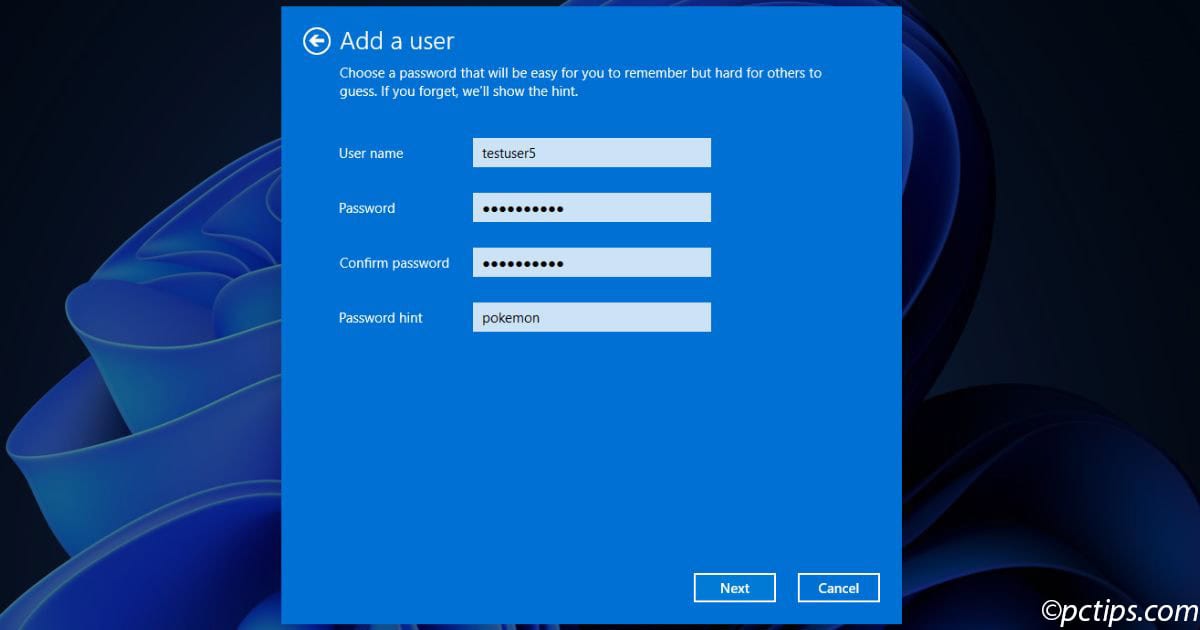
- Fill in your account details:
- User name: The login name
- Password: Choose something secure
- Confirm password: Type it again
- Password hint: Something to jog the user’s memory
- Click Next, then Finish.
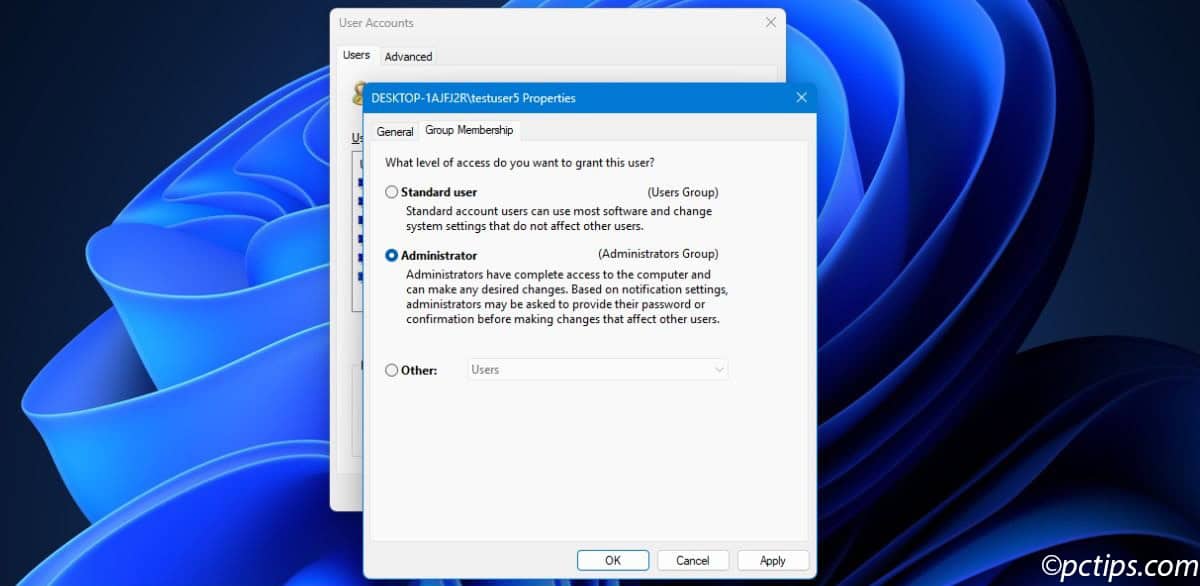
- To make the account an administrator, select it from the list, click “Properties,” go to “Group Membership,” select “Administrator,” and click “Apply.”
Netplwiz also shows you which accounts have passwords and which don’t—super helpful for security audits.
Plus, it’s the easiest way to remove the password requirement for automatic login (though I don’t recommend that for shared computers).
Standard vs. Administrator Accounts: What’s the Difference?
Now that you know how to create accounts, let’s talk about the two types you can make.
Understanding this difference is crucial because it affects what each user can actually do on your computer.
Standard accounts give users essential functionality without system-level access.
With a standard account, you can:
- Run most programs and applications
- Change personal settings like wallpaper, themes, and preferences
- Save files to your own Documents, Pictures, and Desktop folders
- Install apps from the Microsoft Store
- Browse the internet and use email
- Play games and use productivity software
Standard accounts cannot:
- Install traditional desktop software (like Photoshop or older programs)
- Change Windows system settings that affect other users
- Access files belonging to other user accounts
- Modify important Windows system files
- Create or delete other user accounts
- Change security settings or firewall configurations
Administrator accounts have complete control over the computer. Everything a standard user can do, PLUS:
- Install any software from any source
- Change system-wide settings like network configurations
- Access every file on the computer, including other users’ private folders
- Create, modify, or delete any user account
- Change Windows security settings
- Install hardware drivers and system updates
- Modify the Windows registry and system files
For most family members or occasional users, standard accounts are perfect.
They provide plenty of freedom to personalize their experience while preventing accidental system damage.
You can always upgrade an account to administrator status later if needed.
Verification Steps
No matter which method you used, it’s smart to verify that your new local account actually works before calling it done.
Here’s how to test everything:
- Test the login credentials by logging out of your current account (or restarting your computer) and signing in with the new username and password.
- Verify the account type by going to Settings > Accounts > Other Users.
Your new account should appear in the list, and it should show either “Standard user” or “Administrator” depending on what you intended to create. - Check permissions by trying to do something that matches the account type:
- For standard accounts: Try installing an app from the Microsoft Store (this should work) and then try installing a traditional desktop program (this should prompt for admin credentials)
- For administrator accounts: Try accessing Control Panel > User Accounts or installing any desktop software (both should work without additional prompts)
- Test file access by creating a file on the desktop and then switching back to your original account to see if the file is isolated to the new user (it should be).
If any of these tests fail, go back and check your work.
The Bottom Line
Creating local accounts used to be Windows 101.
Microsoft has definitely made their preference for online accounts crystal clear, but that doesn’t mean you have to follow their lead.
Here’s what I like about these methods:
Every method I’ve shared works reliably, and each serves different comfort levels.
Maybe you’re drawn to the familiar Settings path, or perhaps PowerShell’s precision appeals to your inner tech enthusiast.
There’s genuinely no wrong choice here.
For family computers, privacy-focused setups, or situations where internet connectivity isn’t guaranteed, local accounts are often the smarter solution.
Your computer, your rules.
Have you tried any of these approaches yet?
I’m always curious to hear which method resonates with different people.
The comments are great for sharing experience.